Greens and Cabbage, Cooked by Texture Instead of by Timer
Cooking greens and cabbage by texture, not clock: braise collards low, wilt spinach fast, and sear cabbage hot so it never smells sulfurous.
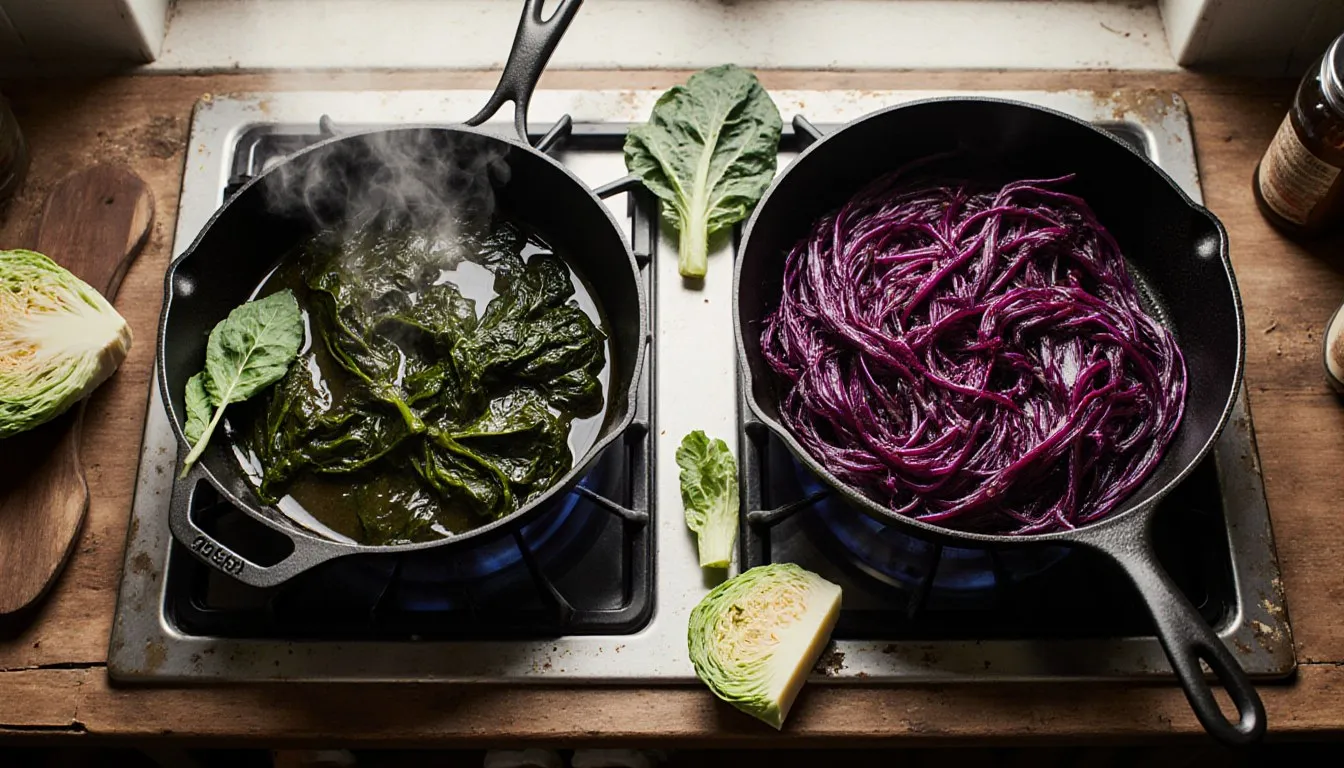
Sturdy greens want an hour and tender greens want ninety seconds, and treating them the same is why your collards came out tough and your spinach came out as a puddle. Cabbage is its own animal again: it turns sweet and nutty under high, fast heat, and turns gray and sulfurous under a long lazy simmer. Sort what is on your cutting board into three piles by how thick the leaf is, give each pile the method it needs, and cook to what you see and smell instead of what the recipe’s clock says. Do that much and you have it; everything below is the detail that makes it work.
Why do cooked greens turn out bitter or slimy?
Because the same pan does opposite things to different leaves. A spinach leaf is mostly water held in a very thin cell wall. Heat it and the walls give way almost immediately, the water runs out, and what is left slumps into that gray-green sludge nobody wants on a plate. Three minutes in a covered pan is already a minute and a half too long.
A collard leaf has the opposite problem. It is built with tough fiber that has to break down before the leaf tastes like anything but a bitter mouthful of chew. Pull it off the heat at the ten-minute mark, when it still looks bright and promising, and you get exactly what most people describe as “I don’t like greens”: leathery texture and a sharp, sinus-clearing bitterness with nothing to soften it.
Bitterness in the sturdy greens is also seasonal and varietal, which is worth knowing before you blame yourself. Mustard greens are aggressively peppery by design. Collards picked after a frost are noticeably sweeter than collards picked in September heat, which is why the old Southern habit is to wait for the cold before cutting them. Cook them long enough for the bitterness to mellow, then balance what is left with fat, salt, and acid: bacon drippings or butter, more salt than feels right, and a splash of vinegar at the end.
So stop thinking about greens as one vegetable with one cooking time. Sort them by leaf structure. It is the same instinct behind the broader question of how to cook vegetables, where the density of the thing in your hand tells you the method before any recipe does.
Sturdy greens or tender greens: which one is on your cutting board?
Pick up a leaf and fold it. If it resists, has a thick fibrous rib running up the middle, and feels almost like a piece of fabric, it is sturdy. If it folds limp over your finger and feels like it would tear under its own weight, it is tender.
Sturdy greens, the ones that want time:
- Collard greens: the toughest of the common ones, broad flat leaves, thick center rib. Wants 45 minutes and up.
- Kale: curly kale and lacinato (dinosaur kale) both qualify. Lacinato softens faster, curly holds its shape longer.
- Mustard greens and turnip greens: peppery, slightly thinner than collards, so they need less time.
- Swiss chard stems: here is the split that trips people. The chard stem is sturdy, the chard leaf is tender. Slice the stems off, cook them like celery for five or six minutes, then add the leaves at the end.
Tender greens, the ones that want seconds:
- Spinach: the fastest of all, especially baby spinach.
- Swiss chard leaves and baby chard.
- Beet greens: my favorite freebie in the whole produce aisle. If your beets come with the tops still on, you paid for two vegetables. Cook them like chard.
- Arugula and watercress, if you are cooking them at all. Both wilt in the residual heat of a hot dish without ever meeting the pan.
Mature spinach with thick stems sits in between, and honestly, a big bunch of it can take a full minute where baby spinach takes fifteen seconds. Trust your eyes over any list, mine included.
Wash everything more thoroughly than feels necessary. Collards and chard grow in sandy soil and hold grit in the crimps of the leaf. Fill the sink, dunk and swish, then lift the leaves out of the water rather than pouring the whole thing into a colander, which pours the sand right back over them. My mother did this with every bunch that came in the house, and on this one there is no arguing: gritty greens are unsalvageable.
How do you braise sturdy greens like collards and kale?
Fat first, then liquid, then time. Render three or four strips of chopped bacon in a heavy pot over medium heat until the fat pools and the pieces are browning at the edges. Add a diced onion to the fat and cook it soft, six or seven minutes. Two cloves of minced garlic go in for about thirty seconds, just until you can smell them, no longer.
Then the greens. Strip the leaves off the tough center ribs, stack them, roll them like a cigar and cut across into ribbons an inch wide. A big bunch looks like a mountain in the pot and cooks down to almost nothing, so use twice as much as you think you need. Add them in handfuls, letting each batch collapse before the next one goes in.
Pour in enough liquid to come about a third of the way up the greens, not to cover them. Chicken stock is the standard, water works, and a smoked turkey wing or a ham hock in place of the bacon gives you the deeper, smokier version. Add a splash of cider vinegar now (a tablespoon or two), a pinch of red pepper flakes, and a good amount of salt. Bring it to a simmer, lid mostly on, heat low enough that it burbles rather than boils.
Now the part that matters more than any timing I can give you: taste a piece. Collards typically want 45 minutes to an hour and a half, kale wants 25 to 40, mustard greens are usually happy at 30. But the leaf tells you the truth. It is done when a bite gives way completely with no fibrous resistance and the flavor has gone from sharp to mellow and almost savory. If it still fights your teeth, it needs more time and more liquid. There is no such thing as a collard green that is done at 20 minutes because you are hungry.
That dark liquid left in the pot is pot likker, and in the Southern tradition it is half the reason you cooked the greens at all. Cooks have long insisted the likker is where the good stuff ends up, and it gets sopped up with cornbread or drunk from the bowl. Do not drain it away. Season it, taste it, and spoon it over the greens when you serve.
Finish with more vinegar off the heat. Sturdy greens can absorb a startling amount of acid, and the splash at the end is what makes the whole pot taste bright instead of heavy. Hot sauce on the table is not optional in my house.
How do you cook tender greens like spinach and chard without turning them to mush?
Hot pan, thin layer, thirty to ninety seconds, done. Tender greens want a fast wilt in a dry hot pan. The biggest mistake is adding liquid, since they carry plenty of their own and will let it go the second they hit the heat.
Get a wide skillet properly hot over medium-high. Add a tablespoon of olive oil or butter and a thinly sliced clove of garlic, and let it go pale gold, maybe twenty seconds. Add the greens still slightly damp from washing, all at once, with tongs. They will fill the pan absurdly. Toss constantly. Baby spinach collapses in fifteen to thirty seconds, mature spinach in about a minute, chard leaves in a minute or two. The moment the last leaf goes from stiff to glossy and limp, pull the pan off the burner.
Salt at the very end, never at the start. Salt pulls water out of those thin cells and gives you a watery pan instead of a wilted green. Same reason a lid is the enemy here: it traps steam and turns a wilt into a boil.
If you do end up with liquid in the pan, tip the greens into a colander and press gently with the back of a spoon. Spinach in particular will release a shocking amount, and for anything going into a filling, lasagna, or a dip, you want to squeeze it out in a clean kitchen towel and wring it like a wet swimsuit. Squeeze harder than feels polite.
Chard deserves the full treatment. Slice the stems into half-inch pieces and cook them in the oil for five minutes until they start to soften, add the sliced leaves and toss for another minute or two, then finish with lemon and a pinch of salt. Rainbow chard stems keep some of their pink and gold color if you do not overcook them, which makes a plain side dish look like you tried.
How do you stop cabbage from smelling like sulfur when it cooks?
Cook it hot and fast, and stop cooking it while it still has bite. The longer cabbage sits over heat, the more of its sulfur compounds break down into the smell that finds you down the hallway. Broccoli and Brussels sprouts do the same thing for the same reason. The stink is cumulative. A five-minute sear barely produces any, a forty-minute boil produces plenty.
So the fix is timing more than anything else:
- Sauté, roast, or stir-fry instead of boiling. Dry heat browns the sugars and gets you sweetness rather than sulfur.
- If you must boil or steam, keep it brief and leave the pot uncovered so the volatile compounds escape rather than condensing back into the water.
- Cut the wedges or ribbons on the thinner side so they cook through before the outside overcooks waiting on the middle.
- Use it while it is fresh. A cabbage that has been rolling around the crisper drawer for three weeks smells stronger when it cooks than one bought last week.
The old folk fixes, a heel of bread or a splash of vinegar tossed into the boiling water, have circulated in kitchens for generations, and cooks still swear by them. I have never found either one to do much next to the far simpler move of taking the pot off the stove five minutes earlier. The gray color and the smell both climb on the same curve, so pulling the pot early takes care of the two of them at once. If you are boiling wedges for corned beef, start testing at eight minutes with the tip of a knife; it should slide in with a little drag left.
Worth knowing that the varieties differ. Napa cabbage and savoy have thinner, more ruffled leaves and cook fast enough that they rarely have the chance to stink. Dense green cabbage is the usual culprit. Red cabbage brings a bonus complication: its pigment turns an unappetizing blue-gray in the presence of anything alkaline, which is exactly why nearly every classic red cabbage recipe includes vinegar, wine, or apples. The acid keeps it red.
What’s the best way to sauté cabbage?
Thin slices, a pan hotter than you think, and the discipline to leave it alone.
Quarter a head of green cabbage through the core, cut the core out of each wedge, and slice across into ribbons about a quarter-inch thick. Half a head feeds three or four people as a side, which surprises everyone the first time.
Heat a large skillet, cast iron if you have it, over medium-high until a drop of water skitters. Add two tablespoons of butter or bacon fat. Add the cabbage, season with salt and a few grinds of black pepper, and then spread it into a layer and do not touch it for two or three minutes. That untouched contact with hot metal is where the browning happens, and browning is the entire reason to sauté cabbage instead of boiling it. If you stir constantly you get steamed cabbage in a buttery pan, which is fine but not what we came for.
Toss, spread it out again, and give it another two or three minutes. Total time runs eight to twelve minutes depending on how crowded the pan is. You want brown-edged, still slightly toothsome ribbons, not soft ones. Taste at the eight-minute mark and go from there.
Finish with a splash of cider vinegar or a squeeze of lemon while the pan is still hot, and let it hiss and evaporate. A teaspoon of caraway seed added with the butter takes it straight to Central Europe. A spoonful of grainy mustard stirred in at the end works too, no effort at all, and turns a side dish into something you would eat with a pork chop and be pleased about.
If your pan is not big enough for the whole head, cook it in two batches rather than crowding it. Crowded cabbage steams in its own moisture and you lose the browning entirely.
How do you braise cabbage low and slow for a different result?
Long-cooked cabbage is worth doing when acid and sugar are in the pot from the start, which is the German braised red cabbage tradition and the reason it works where a plain long boil fails. The vinegar keeps the color from going blue, the fruit and sugar balance the sulfur, and forty-five minutes of gentle heat turns the leaves silky rather than slimy.
The method: melt a couple of tablespoons of butter or duck fat in a heavy pot, soften a sliced onion in it, then add a shredded head of red cabbage, one or two peeled and chopped tart apples, about a third of a cup of red wine vinegar, a splash of red wine or apple juice, a couple of tablespoons of brown sugar, salt, and a bay leaf. I use duck fat when I have it and butter when I do not, and I reach for a Granny Smith every time, because a sweet apple cooks down into applesauce and disappears while a tart one holds its shape and keeps the pot from going cloying. Some cooks add a few cloves or juniper berries. Cover and cook over low heat, stirring occasionally, for 45 minutes to an hour and a half. Add a splash of water if it looks dry.
Check the pot at 45 minutes and go by what you see. Silky shreds sit in a syrupy liquid that clings to the spoon and drags a little when you pull it across the bottom of the pot; the color has gone deep and jewel-toned, and a shred collapses when you press it against the side. Watery liquid pooling under limp gray-purple cabbage means the lid stayed on too tight, so take it off and let it cook down. It is done when the shreds are completely tender and the liquid has reduced to a glossy coating. Taste for the sweet-sour balance at the end and adjust with more vinegar or more sugar, because apples vary wildly in how tart they are.
This one improves overnight. Make it the day before a holiday meal and reheat it gently, which is the actual reason it shows up on so many Christmas tables: it is the dish that takes care of itself while everything else needs your attention.
Green cabbage braises well too, more gently seasoned, in stock and butter with a little onion for 30 to 40 minutes until meltingly soft. That soft-cooked style is also the direction to go if you are heading toward easy cabbage rolls, where the leaves need to be pliable enough to wrap.
Can cabbage and hardy greens be eaten raw?
Both, and cabbage especially. Shredded raw cabbage is crunchy, faintly sweet, and holds up under dressing for hours without wilting, which is why it is the backbone of slaw everywhere. Slice it as thin as you can manage, salt it lightly, and let it sit for twenty minutes if you want it slightly softened and less watery in the bowl. If it is a dressed slaw you are after, coleslaw recipes go into the dressing ratios properly.
Raw kale needs one extra step to be worth eating, and skipping it is why kale salad has a reputation. Strip the leaves off the ribs, slice them thin, put them in a bowl with a little olive oil and salt, and massage them with your hands for a minute or two. You will feel the leaves go from stiff and squeaky to soft and dark green, and they shrink noticeably. The fat and the physical pressure break down the cell structure the way heat would, without the heat. Lacinato kale is the best candidate; curly kale works but stays chewier.
Raw collards are a harder sell but not impossible if you slice them into whisper-thin ribbons and dress them aggressively. Raw mustard greens are ferociously hot, so use them the way you would use arugula, a small handful mixed into something milder rather than a whole salad. Tender greens are of course fine raw, that is what baby spinach is doing in every clamshell at the store.
Massaged kale keeps in the fridge for a day or two and gets better, not worse, because unlike lettuce it does not collapse under dressing. Pack a kale salad in a lunch container in the morning and it is still good at noon.
How do you fix greens that turned out bitter?
Four things, applied in this order: salt, fat, acid, and a small amount of sweetness. Salt suppresses the perception of bitterness more effectively than almost anything else, so taste first and add more than you think. Fat coats the palate and rounds sharp edges, which is why a knob of butter, a glug of good olive oil, or the bacon you should have started with makes an immediate difference. Acid brightens and redirects: a tablespoon of cider vinegar or a squeeze of lemon stirred into a pot of collards changes the whole read of the dish.
Sweetness last, and sparingly. A teaspoon of honey or brown sugar, or a handful of chopped sweet onion cooked down in the pot, balances the bitterness without making a dessert of your vegetables. A spoonful of sugar in the collard pot is old Southern practice, and so is the apple and brown sugar in German braised red cabbage, both of them putting a little sweetness up against the bitterness that long-cooked brassicas and greens carry.
Then there is bitterness that is a mistake versus bitterness that is the point. Undercooked sturdy greens are bitter because the fiber has not broken down, and the fix is more time, not more seasoning. Burnt garlic in the pan makes everything acrid and cannot be seasoned out, start over. But mustard greens, broccoli rabe, and mature dandelion greens are bitter by nature, and if you cook the bitterness out of them entirely you have removed the thing that makes them worth eating. Balance those, do not fight them.
One more thing that actually reduces bitterness in the very toughest greens: a quick blanch in salted boiling water for two minutes before you braise, then drain and proceed. You lose some flavor into the water, so it is a trade, but for a batch of aggressively bitter mustard greens in late summer it can rescue the pot. The general technique is worth knowing for other vegetables too, and blanching vegetables covers when it earns its place.
How long do cooked greens and cabbage keep in the fridge?
Three to four days in the refrigerator at 40°F (4°C) or below, in a covered container, and that number is the standard for any cooked vegetable dish. Cool them down promptly rather than leaving the pot on the stove all evening. Anything cooked should not sit at room temperature for more than two hours total, or one hour once the room passes 90°F (32°C). If greens have been out longer than that, throw them away. I know it is a whole pot of collards and I know they took an hour and a half. Throw them away anyway.
Reheat leftovers thoroughly to steaming hot, 165°F (74°C) if you are checking with a thermometer.
The practical notes on top of the safety ones: braised sturdy greens and braised red cabbage genuinely improve by day two, so cook them ahead on purpose. Wilted tender greens do not. Spinach reheated is a sad thing, and it will keep releasing water into whatever it is sitting in, so cook only what you will eat. Sautéed cabbage holds up better than you would expect and is very good cold, chopped into a grain bowl or piled onto a sandwich.
Raw storage is a different clock. A whole head of cabbage keeps for weeks in the crisper drawer, and if the outer leaves go limp you peel them off and the inside is fine. Cut cabbage dries out at the edges within a few days, so wrap it tightly. Sturdy greens keep about a week wrapped loosely in a damp towel in a bag. Tender greens are on borrowed time from the moment you buy them, and spinach in particular can go from fine to slimy overnight.
Braised greens freeze well, pot likker and all, and a container of them thawed on a Tuesday makes a weeknight dinner out of nothing but rice and a fried egg. Cabbage does not freeze well raw, but braised red cabbage freezes beautifully, which is another argument for making the big batch.
Tessa Calloway
Staff Writer
Tessa Calloway has spent twenty years cooking dinner on a weeknight clock and testing the shortcuts that survive contact with a real kitchen. She believes the best recipe is the one you can make with what's already in the house, and she has strong opinions about what actually needs to be homemade (less than you think) and what always does (dressing).