The Two-Zone Fire Fixes More Grilling Problems Than Any New Smoker
Grilling and smoking meat comes down to two-zone heat, the right wood, and an instant-read thermometer. Here’s the setup, the safe temps, and the fixes.
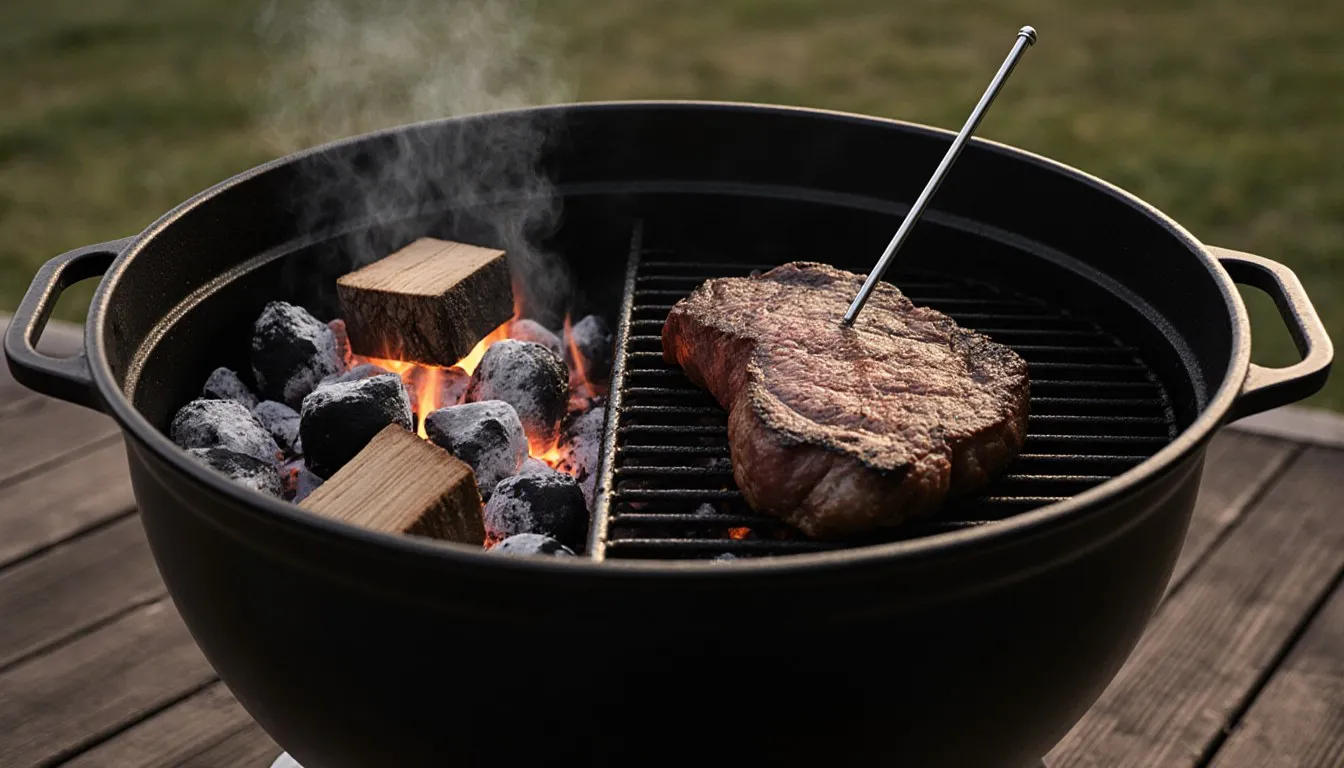
Bank all your coals on one side of the grill and leave the other side empty. That single move fixes more backyard cooking than any equipment upgrade on the market, because it gives you a hot zone to build crust and a cool zone to finish without turning dinner into charcoal. Grilling and smoking meat are the same idea running at two different speeds: hot and fast over the fire, low and slow beside it. Get the heat where you want it, pick a wood that suits the meat, and read an internal temperature instead of a clock, and the rest is detail. Below, how to build both fires, what each wood family does, the safe temperatures that are not up for debate, and why your six-hour cook will stubbornly refuse to finish in six hours.
What’s the real difference between grilling and smoking?
Grilling is direct heat and short time. The meat sits over live fire, the grate runs somewhere north of 450°F (232°C), and the cook is measured in minutes. You’re chasing browning, that deep savory crust, and you’re doing it on cuts that were already tender when they hit the grate.
Smoking is indirect heat and long time. The fire burns off to one side or in a separate box, the chamber holds a lazy 225°F to 275°F (107°C to 135°C), and the cook is measured in hours. You’re chasing something different here: the slow breakdown of collagen in a tough, hardworking cut into gelatin, which is what makes a brisket or a pork shoulder go from chewy to sliceable to shreddable.
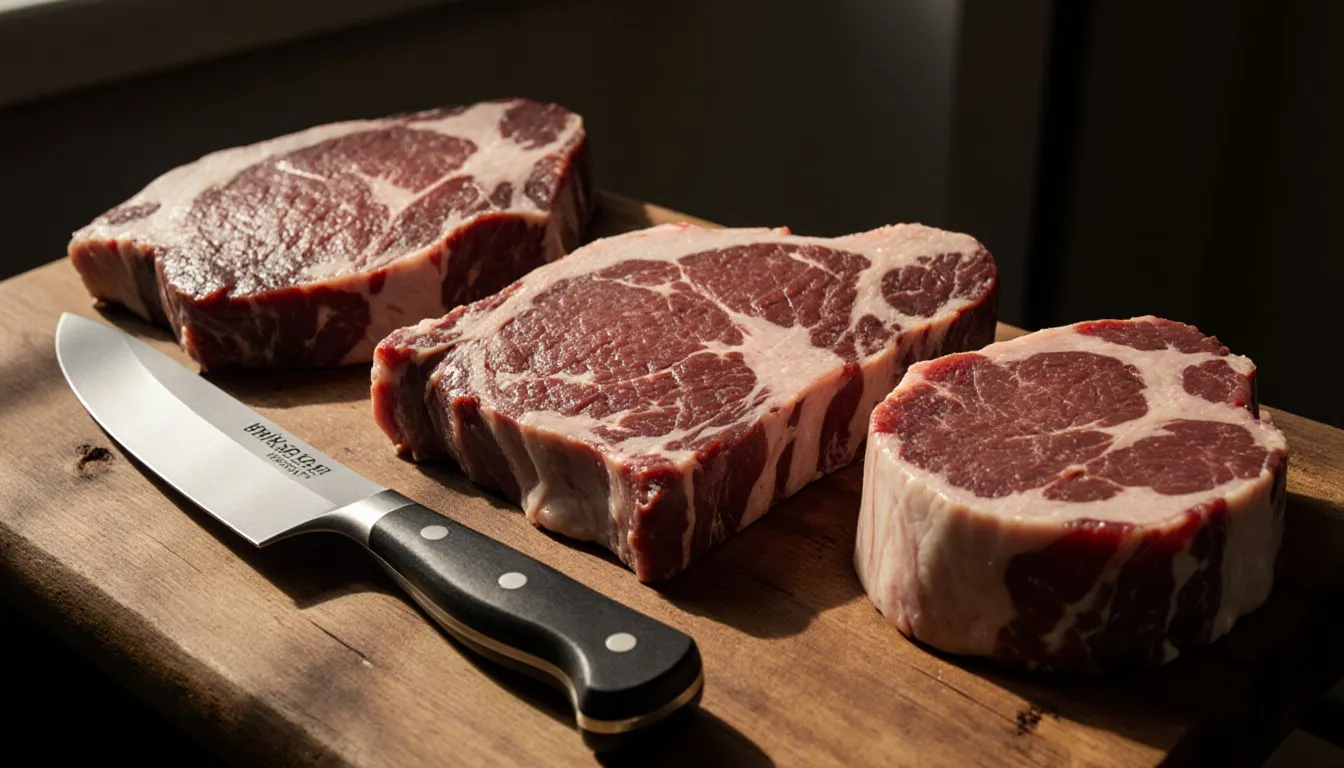
Which one a cut wants is decided by the animal’s own anatomy, and if you’ve ever wondered why the same steer gives you both a filet and a chuck roast, the broader look at types of meat covers that better than I can in a paragraph. The short version for the grill: muscles that did a lot of work want low and slow, muscles that loafed want hot and fast. Ribeye, chops, chicken thighs, sausages, burgers go over the fire. Brisket, ribs, pork shoulder, beef cheeks go beside it.
Plenty of cooks do both in one session, and that is where a lot of home cooking goes sideways. A thick steak wants gentle indirect heat first and a hard sear at the end. A rack of ribs wants hours of smoke and then, if you like, three minutes over the coals to set a glaze. Neither one works on a grill that’s blazing hot edge to edge.
Which grill or smoker fits the way you cook?
Buy for how often you cook and how much fiddling you enjoy, not for what looks impressive on a patio. A basic charcoal kettle is still one of the most capable pieces of equipment you can own, and anyone who sneers at one has never eaten off a well-run kettle.
- Charcoal kettle: cheap, portable, terrific at both jobs if you’re willing to manage vents. Real fire flavor. You’ll add fuel on long cooks and clean ash out afterward.
- Gas grill: the weeknight workhorse. Push a button, cook in fifteen minutes, done. It grills beautifully and smokes poorly, because there’s no combustion of solid fuel to give you smoke. A foil packet of chips over a burner gets you partway there. If a gas grill is what you have, plenty of gas grill recipes are built around exactly that.
- Pellet grill: a thermostat and an auger doing the work of a pitmaster. Set 250°F, walk away, come back to dinner. The flavor is milder than a stick fire because the pellets burn very cleanly, and searing is a weak point on most models. Needs electricity and a dry place to store pellets.
- Kamado: thick ceramic, ferocious insulation, holds low temperatures for hours on very little charcoal and also gets hot enough to blister a pizza. Heavy, breakable, and slow to come down once you overshoot your target temperature, so you creep up on the number rather than blowing past it.
- Offset smoker: the real deal, a firebox on the side feeding a long cooking chamber. Thin cheap offsets leak heat and will make you miserable. A heavy one holds its temperature through a clean stick fire, which is the flavor people buy an offset for, and asks for a split of wood and a look at the vents every forty-five minutes for the whole cook.
If you cook twice a week and want dinner on the table, gas plus a kettle covers your whole life. If you want to spend a Saturday babysitting a fire with a beer in your hand, that’s a genuine hobby and an offset is the tool for it. Both are legitimate, and the ribs come off the cheap kettle tasting like ribs.
How do you set up two-zone heat on a grill?
On charcoal: light your chimney, dump the coals onto one half of the charcoal grate, and pile them two or three deep. Leave the other half bare. On gas: light the burners on one side and leave the rest off. Easy peasy, and it takes ninety seconds.
Now you have two tools instead of one. Food starts or finishes over the empty side with the lid down, where it cooks by convection like an oven, and gets its sear over the coals. Thick cuts do better going indirect first and searing last, because the interior comes up evenly and the crust goes on at the end when the surface is already dry. Thin cuts and burgers can sear first and slide over to coast.
The cool side is also your fire escape. Fat drips, flames leap, and you need somewhere to move the chicken thighs that isn’t the kitchen. Without a safe zone you end up doing that panicky dance with the tongs, spraying water on the coals and swearing.
Vents do the temperature work on charcoal. The bottom vent controls how much oxygen reaches the fire, so it’s your main dial; the top vent stays mostly open to pull air through. Close them both fully and the fire dies, which is also how you shut down and save leftover charcoal for next time. And ignore the thermometer in the lid. It reads the temperature of the dome, which can be off from what’s happening at grate level by a wide margin. Clip a probe near the food instead.
What wood should you use for smoking meat?
Match the intensity of the wood to the intensity of the meat, and the pairings sort themselves out. Pitmasters have argued the fine points of this for generations, and the honest answer is that within a family it’s preference, but across families the difference is real and you’ll taste it.
- Fruitwoods (apple, cherry, peach): mild and slightly sweet. The forgiving choice for poultry and pork, and hard to overdo. Cherry is traditionally credited with giving a deeper mahogany color to the finished bark, which is why plenty of cooks mix it with something stronger.
- Post oak: the Central Texas standard for brisket, medium-bodied and steady, a background note rather than a shout. Oak burns clean and long, which is a large part of why offset cooks favor it.
- Hickory: assertive and bacon-adjacent. The classic for pork shoulder and ribs. Run it alone on a long cook and it can turn a bit acrid, so many cooks stretch it with fruitwood.
- Mesquite: the loudest one in the room. It burns hot and fast and its flavor is sharp and earthy, which suits quick direct-heat cooking and beef better than it suits a twelve-hour smoke. If mesquite smoked chicken is your target, a little goes further than you’d expect.
- Pecan: hickory’s gentler cousin. A good middle setting when fruitwood reads too shy and hickory too loud.
- Alder: light and faintly sweet, the Pacific Northwest tradition for salmon.
Two hard rules, and these aren’t preference. Never burn treated, painted, stained, or reclaimed construction lumber, and never burn resinous softwoods like pine, spruce, or fir. Those put things in your food that have no business there. Use seasoned hardwood sold for cooking, and nothing else.
Chunks over chips for anything longer than an hour, because chips flash and vanish. What you want is thin blue smoke, nearly invisible, drifting out of the vent. Thick white billowing smoke means the wood is smoldering rather than burning and it deposits a bitter, sooty film on the meat. Meat also takes on smoke most readily early in the cook while the surface is still cool and damp, so front-load your wood rather than tossing chunks in all afternoon.
The pink layer under the surface, the smoke ring, is the one thing people fuss over that doesn’t matter. It’s a chemical reaction between combustion gases and the pigment in the meat, and a beautiful ring tells you nothing about how the barbecue tastes. Judge by taste and bark.
What internal temperature should meat hit before it comes off?
Cook to temperature, never to time, and buy the thermometer before you buy anything else. These are the safe minimums, and they are not the place for improvisation:
- All poultry, whole or ground: 165°F (74°C).
- Ground beef, pork, veal, and lamb: 160°F (71°C).
- Whole cuts of beef, pork, veal, and lamb (steaks, chops, roasts): 145°F (63°C), followed by a three-minute rest before carving or eating.
- Fish and shellfish: 145°F (63°C).
- Leftovers and anything reheated: 165°F (74°C).
Take the reading in the thickest part, away from bone and away from fat, and check more than one spot on a big cut. Barbecue adds a second, separate number that has nothing to do with safety: tough collagen-heavy cuts like brisket and pork shoulder aren’t pleasant to eat at their safe minimum, and they keep cooking until the connective tissue gives way, usually somewhere around 195°F to 205°F (91°C to 96°C). Past a point you stop watching the display and start feeling for it. The probe should slide in with no resistance, like into softened butter.
Two thermometers earn their keep. An instant-read gives you a fast spot check on steaks and chicken at the grate. A leave-in probe with a wire running out of the lid tracks a long cook without you opening anything. Test either one in ice water every so often; it should read 32°F (0°C), and if it doesn’t, it’s lying to you about everything else too. Chicken is where the safe number and the good number part ways, and how to cook chicken gets into why dark meat eats better closer to 175°F (79°C) than at its 165°F minimum. For beef, how to cook steak lays out the window for every doneness from rare through medium-well, which is what lets you pick a number before the steak hits the grate instead of arguing with it afterward.
Why does a smoke “stall” and ruin your timing?
Somewhere around 150°F to 170°F (66°C to 77°C), a big cut stops climbing. The number sits there. It may sit there for an hour, or four. This is the stall, and it has broken more dinner plans than any other single thing in barbecue.
What’s happening is evaporative cooling. Moisture is wicking to the surface of the meat and evaporating, and evaporation pulls heat away exactly as fast as the smoker adds it. The meat is essentially sweating, and it will keep sweating until the surface finally dries enough for the temperature to start climbing again.
Do not crank the heat to muscle through. All you’ll accomplish is drying the outside and firming the meat before the collagen has had time to do its work. Do not panic and pull it early either. Wait it out, wrap it (next section), or simply plan for it.
Planning for it means throwing out clock-based math. Pounds-per-hour estimates are a starting sketch, useful for deciding when to light the fire and useless for deciding when to eat, because two briskets of identical weight can finish hours apart depending on fat, grain, and how your pit runs that day. If you need a realistic window to plan around, the numbers in brisket cooking time are worth a look before you tell twelve people to show up at six. Start earlier than you think you need to, and lean on the rest at the end to absorb the difference.
Should you wrap meat partway through a smoke?
Wrap if you want to finish faster and hold more moisture, skip it if bark is what you’re after. That’s the whole trade, and both answers are correct depending on what you want on the plate.
Pitmasters call it the Texas crutch. You commit when the bark has gone from wet and tacky to a dark, dry crust that holds its color when you drag a thumb across it instead of smearing, which tends to land right around the time the stall does. Trapping steam around the meat stops the evaporative cooling cold and the temperature starts climbing again.
- Heavy foil: the tightest seal, the fastest finish, the most moisture retained. It also steams the crust, so the bark you spent five hours building goes soft. Some cooks unwrap for the last stretch to firm it back up.
- Pink butcher paper: breathable, so some moisture escapes and the bark survives in much better shape. Slower than foil, faster than nothing. This is what most Texas brisket cooks reach for. Use unwaxed, uncoated food-grade paper, never the waxed kind.
- No wrap: the best bark you’ll get, and the longest cook. Ribs and pork shoulder both take this well if you have the patience and the fuel.
Wrap too early and you smother the bark before it forms, ending up with something closer to pot roast. Wait until the surface looks the way you want the finished product to look, because it won’t get much darker after that.
Does grilled or smoked meat need to rest before you cut it?
Yes, and the bigger the cut the more it matters. I have watched a man carve a fourteen-hour brisket ninety seconds after it came off the pit, in front of guests, and the puddle on that board was the dinner he’d been promising all day. Two things happen while meat rests. Carryover cooking carries the interior temperature up a few more degrees on a steak and considerably more on a large roast, which means you pull food off the fire slightly before your target, not at it. And the muscle fibers, squeezed tight by the heat, loosen their grip and hang onto their juices instead of flooding the cutting board the second the knife goes in.
The clock is a starting point; your hand is the better instrument. A steak is ready to cut when the surface has stopped hissing and the outside feels warm rather than hot to the back of a finger. A big cut is ready when the exterior has gone from tight and glossy to relaxed and matte, and the probe reading has crested and started drifting down. Tent it loosely so steam can leave, because foil crimped tight around a beautiful bark turns it soft in ten minutes and there is no getting it back.
Rough guidance by size:
- Thin steaks, chops, burgers, chicken pieces: about 5 minutes.
- Thick steaks and roasts: 10 to 20 minutes, longer for larger cuts.
- Brisket and pork shoulder: an hour or more, and it improves them.
That long barbecue hold has a rule attached to it. Cooks park a wrapped brisket in an empty dry cooler to coast, and that works, but food held in the range between 40°F and 140°F (4°C and 60°C) is food growing bacteria. Preheat the cooler with hot water first, dump it, wrap the meat well, and confirm with a probe that it’s still holding above 140°F (60°C). Anything drifting below that goes straight into the refrigerator to be reheated later, not held on the counter. Whole-muscle cuts also need that three-minute rest at 145°F (63°C) as part of the safety standard itself, not just for texture.
What mistakes ruin most backyard grilling and smoking?
The same handful, over and over, and every one of them is free to fix.
- Flipping too soon. Meat releases from clean hot grates on its own when a crust has formed. If it’s sticking and tearing, it isn’t ready. Leave it alone.
- Peeking. Lifting the lid to look costs you more than patience: every lid lift dumps heat and stalls the cook. Use a leave-in probe and keep your hands off.
- Cooking without a thermometer. Poking with a finger and cutting into the meat to look are both worse than a fifteen-second reading, and neither one tells you whether the chicken is safe.
- Salting at the wrong moment. Salt well ahead, ideally an hour or more for thick cuts, or salt immediately before it goes on. Salting in the middle window draws moisture to the surface with no time to reabsorb, and you fight a wet surface that refuses to brown.
- Saucing early. Sugar in barbecue sauce burns black long before the meat is done. Sauce goes on in the last few minutes, over the cooler zone, then a quick pass over the fire to set it.
- Cold grates and a crowded surface. Preheat until the grates are properly hot and scrape them clean. Then leave gaps between pieces so heat circulates rather than steaming everything.
- Trusting the lid thermometer. Covered in the two-zone section above, and worth repeating because it’s the reason so many “225°F” cooks are running at 300°F.
Every fix on that list costs you a bag of charcoal, an extra twenty minutes of patience, and the discipline to believe the thermometer over your gut. If you want to prove all of it in one cheap afternoon, run a pack of chicken thighs: they cost a few dollars, they cook fast enough that you can set the two-zone fire and use it twice, and they will tell you honestly whether your grates were hot enough and your probe is reading true.
Next time out, try a reverse sear on something thick: a two-inch steak or a pork loin roast, indirect side with the lid down until it’s about 15°F short of your target, then straight over the coals for a minute or two per side. Same fire, same thermometer, entirely different crust. And if the weather turns and the grill is buried in snow, how to smoke meat in oven gets you a decent approximation indoors until spring.
Tessa Calloway
Staff Writer
Tessa Calloway has spent twenty years cooking dinner on a weeknight clock and testing the shortcuts that survive contact with a real kitchen. She believes the best recipe is the one you can make with what's already in the house, and she has strong opinions about what actually needs to be homemade (less than you think) and what always does (dressing).