Half the Gear a Recipe Demands Is Already in Your Drawer
Kitchen equipment substitutes that hold up in a real kitchen: double boiler, stand mixer, rolling pin, springform and more, plus the few tools worth buying.
Most of the equipment a recipe demands has a stand-in sitting within arm’s reach, and you can start the recipe tonight. A metal bowl is a double boiler. A wine bottle is a rolling pin. A sharp knife and ten minutes beat a food processor for anything you want to still look like food. The short list of tools that genuinely cannot be faked starts with an instant-read thermometer, a candy thermometer, proper canning equipment, and a pan the right size. Everything else on the shopping list is negotiable, and below is what each swap costs you in texture, time, or patience.
Do you need the tool the recipe says you need?
Usually not. Recipe writers list equipment the way they list ingredients, assuming a stocked kitchen, and a lot of what sounds specialized is one shape doing one job. A pastry blender cuts cold fat into flour. So do your fingers, two knives, and a box grater. A sifter aerates and de-lumps. So does a fine-mesh strainer, which you already own and which does six other things.
What separates a workable swap from a bad one is knowing which job the tool is really doing. A double boiler exists to keep a bowl off direct heat. Any heatproof bowl over any pot does that. A candy thermometer exists to tell you that sugar syrup has hit 300°F, and nothing in your drawer can tell you that within twenty degrees. Syrup at 240°F and syrup at 300°F look nearly the same in the pan, both pale and lazily bubbling, and one sets into a chewy caramel while the other shatters. Copying the bowl-over-a-pot shape takes thirty seconds and a cupboard. Reading the syrup takes a thermometer, and there is no clever substitute for the number.
So when a recipe stalls over a piece of equipment, ask what that tool is measuring or protecting, and improvise freely everywhere else. My mother called this making do, and she said it like a compliment. She also owned exactly one thermometer and guarded it like the good scissors.
What can you use instead of a double boiler?
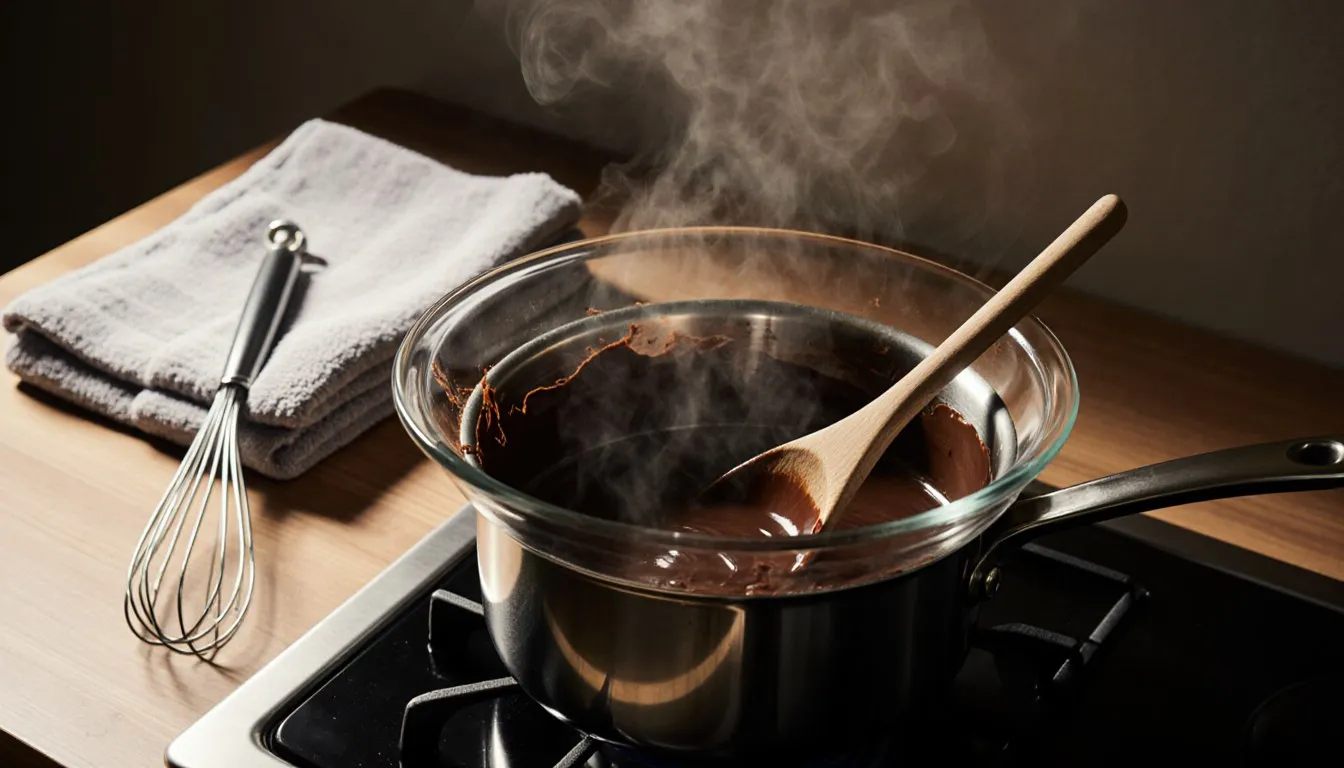
A heatproof bowl set over a saucepan of simmering water, and it works so well that most people who own a real double boiler still reach for the bowl. Use a metal or tempered glass bowl wide enough that its rim rests on the pot’s edge with the bottom hanging free inside. If the bowl drops all the way in or wobbles on top, find another pot.
Put an inch to an inch and a half of water in the saucepan, enough to make steam for fifteen minutes without boiling dry, and leave at least an inch of clearance between the water and the bottom of the bowl. The bowl must not touch the water. Contact turns gentle steam heat into direct heat, and direct heat is what scrambles your custard base and seizes your chocolate into a grainy paste that no amount of stirring will bring back.
Keep the water at a bare simmer, small bubbles at the edge, not a rolling boil. Steam that escapes hard around the bowl can carry droplets into melting chocolate, and chocolate takes a drop of water about as well as a cat takes a bath. For lemon curd or hollandaise, stir constantly and pull the bowl off the moment it thickens enough to coat the back of a spoon and hold a line when you drag your finger through it. Residual heat in the bowl keeps cooking after you take it off the pot, so pull early.
Two things to skip: plastic bowls, which warp and can leach, and any jar or glass not marked heatproof, which can crack. A saucepan set inside a wider saucepan works in a pinch too, though the narrow contact makes it harder to stir without sloshing.
No stand mixer, no hand mixer: what works by hand?
A balloon whisk and a wooden spoon cover most of what a mixer does, and cover it well. Muffin batter, pancakes, quick breads, brownies, and pretty much anything that warns you against overmixing are better by hand, because a hand cannot bully the batter the way a machine can.
Whipped cream is the easy win. Chill the bowl and the whisk in the freezer for ten minutes, start with cold heavy cream, and whisk in big circles from the wrist. Soft peaks land in three to five minutes, stiff peaks a minute or two later. Stop when the cream holds a peak that flops slightly at the tip; another thirty seconds past that and you are on your way to butter.
Creaming butter and sugar is the one people give up on too early. The butter has to be properly soft, cool room temperature, dents easily under a finger but is not greasy or shiny. Press it against the side of the bowl with a wooden spoon, working the sugar in, for a good four to five minutes until it looks pale and fluffy rather than yellow and dense. Cold butter will never cream by hand. That is the whole failure, nine times out of ten.
Where hand mixing genuinely falls short:
- Stiff egg whites for meringue. Doable with a balloon whisk and a big metal bowl, but it takes eight to twelve minutes of hard, continuous whisking, and there is no pausing. If your recipe pours hot sugar syrup into whipping whites, you need a mixer, because you cannot whisk and pour at once.
- Long-knead bread dough. Ten minutes of kneading is fine, but the fix is better than the workout: mix the dough, let it rest 20 to 30 minutes so the flour hydrates, then do three or four sets of stretch-and-folds spaced half an hour apart. The dough develops itself while you do something else.
- Seven-minute frosting, marshmallow, and nougat. Anything that whips for a solid seven to ten minutes over heat is a machine’s job.
What replaces a food processor for chopping or pureeing?
It depends entirely on the job, because a food processor is really four tools wearing one coat.
For chopping, a sharp chef’s knife wins outright. A processor bruises onions and herbs into a wet mince that weeps liquid into whatever you add it to, while a knife leaves clean pieces that hold their shape in the pan. If your knife is dull, that’s the actual project for this afternoon.
For grating and shredding, the box grater. Frozen butter on the large holes is a genuinely better result than the processor gives you for scones and biscuits. Grated onion, done on the fine side over a bowl to catch the juice, disappears into meatballs and burgers exactly the way a machine-minced onion does.
For pureeing, a blender, with one caveat: it needs liquid to move. Soup, smoothies, and sauces blend beautifully. Hummus and thick dips need you to stop and scrape the sides three or four times and to add liquid earlier than the recipe says. For hot soup, fill the jar no more than half full, take out the lid’s center cap, cover the hole with a folded towel, and start on low. Steam expands fast in a sealed jar and the mess it makes is memorable.
For pesto and small pastes, a jar and a fork, or a mortar and pestle if you have one. Chop the basil and garlic fine, mash it in the bowl with coarse salt as an abrasive, then stir in oil and cheese. It comes out looser and more textured than the smooth green machine version, and most people prefer it. For breadcrumbs and cookie crumbs, a zip-top bag and a rolling pin or wine bottle gives you more control than a processor, which flips from crumbs to powder in about two seconds.
No rolling pin: what’s already in the kitchen that works?
A wine bottle, and it is the best of the improvisations because you can chill it. Rinse and dry a full or empty bottle, peel off the label if it’s the kind with a raised edge, and roll from the middle outward. Filling an empty bottle with cold water and capping it gives you weight plus a cold surface, which matters for butter-heavy doughs like pie crust and puff pastry, where the goal is keeping the butter in distinct layers rather than smearing it into the flour.
A straight-sided glass jar works for smaller jobs, and a tall drinking glass will get you through a batch of sugar cookies if you’re only rolling a handful at a time. You can feel the difference the moment you start: a bottle straight from the fridge stays cool under your palm and the dough keeps its grip on the butter, while a room-temperature one goes tacky within a few passes and starts lifting dough with it. Once you’re stopping to scrape the glass clean every third pass, the improvising has stopped paying and it’s time to chill the dough for twenty minutes or split it in half and roll it in batches. Anything tapered, like most wine glasses, rolls in an arc and gives you a wedge instead of a round.
To keep dough from grabbing: flour the bottle lightly, not the dough, and re-flour every couple of passes. Better still for sticky doughs, roll between two sheets of parchment or wax paper and skip the flour entirely, which keeps you from working extra flour into a crust that then bakes up tough. If you’re out of parchment too, the guide to a parchment paper substitute covers what to reach for instead. Give the dough a quarter turn every few rolls so you find the sticking before it becomes a tear.
Can you bake without a kitchen scale?
Yes, and generations of American home bakers did it with nothing but nested cups. The technique that makes it work is spoon-and-level: stir the flour in its container to loosen it, spoon it lightly into the measuring cup until it mounds over the top, then sweep the excess off with the back of a knife. Never tap or pack, and never scoop the cup straight through the bag.
Scooping compresses flour, and a scooped cup can come in noticeably heavier than the roughly 120 to 125 grams that most recipes are written around. Do that three times in one recipe and you’ve added a good handful of extra flour, which is why cookies come out cakey and pie crust comes out tough for reasons nobody can identify afterward.
Weight still wins for bread, laminated dough, and anything where hydration matters, because a scale removes the variable entirely and saves you washing four cups. The cups will get you there; the scale just removes the guessing and the arithmetic when you want to halve a bread recipe. Brown sugar is the exception worth noting: it gets packed firmly into the cup, which is the one time the packing instruction is real. The fuller breakdown of what to do when the ingredients themselves go missing lives in the guide to baking substitutions.
How do you check doneness without a meat thermometer?
You buy the thermometer. This is where I stop offering workarounds, because the cues everyone repeats are unreliable in exactly the cases that matter most.
Clear juices do not indicate safe chicken. Color is not a reliable doneness signal in poultry or ground meat, and the touch test on a steak tells you about firmness, not temperature. An inexpensive instant-read digital thermometer is one of the cheapest pieces of kitchen equipment you can buy, and price mostly tracks how fast it reads and whether it’s waterproof, so compare read time and probe thickness rather than chasing a brand.
The USDA minimum safe internal temperatures, measured in the thickest part away from bone:
- All poultry, whole or ground, including chicken and turkey: 165°F (74°C).
- Ground beef, pork, veal, and lamb: 160°F (71°C).
- Whole cuts of beef, pork, veal, and lamb, including steaks, chops, and roasts: 145°F (63°C), followed by a three-minute rest before carving or eating.
- Fish and shellfish: 145°F (63°C).
- Egg dishes: 160°F (71°C).
- Leftovers and casseroles reheated: 165°F (74°C).
Visual cues are still useful for judging when to start checking. Chicken thighs pulling back from the bone, a roast that springs back, fish that flakes when nudged with a fork: those tell you to reach for the thermometer, not to skip it. For a whole bird, check the thickest part of the thigh without touching bone, and check the breast too, since they rarely finish together.
What stands in for a pastry cutter or sifter?
For cutting fat into flour, two butter knives held in one hand and drawn past each other, over and over, through the bowl. It’s slower than a pastry blender and gives you the same result: pea-sized and almond-sized pieces of butter coated in flour, not a uniform paste.
Your fingertips work better than either, with one rule. Work fast and use only the tips, snapping the butter and flour between thumb and fingers and letting it fall back into the bowl. Palms are warm and will melt the butter, and melted butter means no steam pockets, which means no flake. If your hands run hot, freeze the butter and grate it on the large holes of a box grater straight into the flour, then toss with a fork. Easy peasy, and it gives you the most even distribution of the three methods.
For sifting, a fine-mesh strainer held over the bowl, tapped on the side of your hand while the flour falls through. If the recipe just wants the flour aerated and the leaveners evenly distributed, whisking the dry ingredients together vigorously for 30 seconds does the same job. Where whisking will not save you is lumps: cocoa powder, powdered sugar, and almond flour all clump into pellets that a whisk pushes around instead of breaking up. Those need pressing through the strainer with the back of a spoon.
Can you bake a cheesecake without a springform pan?
Yes, with a parchment sling in a regular round cake pan, and for a water-bath cheesecake it’s arguably the better setup. Cut two long strips of parchment, lay them across the greased pan in a cross with several inches hanging over each side, then press a parchment round into the bottom. Build the crust and filling on top. Once the cheesecake is fully chilled, at least six hours and preferably overnight, lift straight up by all four flaps and slide it onto a plate.
Use an 8- or 9-inch round cake pan at least 3 inches deep, and expect a taller, denser slice than the same batter in a 9-inch springform. A springform ring leaks in a water bath, which is why every cheesecake recipe tells you to double-wrap it in foil, and a solid pan simply doesn’t have that problem.
Where a springform still earns its shelf space: tall tortes, ice cream cakes, delicate mousse cakes, and any dessert too fragile to invert or lift. If you want a shortcut past the whole question, a parchment-lined square pan turns most cheesecake recipes into bars, and bars travel better anyway.
When is it not worth improvising?
Some tools are doing a safety job, and those are the ones where the answer is to wait until you own the equipment.
Candy making needs a candy thermometer. Sugar stages sit within a few degrees of each other, soft ball around 235 to 240°F and hard crack around 300 to 310°F, and the difference between them is caramel sauce versus brittle. The cold water test has been passed down for generations and cooks did rely on it, but it’s imprecise, and syrup at those temperatures causes serious burns that boiling water cannot match. Keep a bowl of ice water by the stove whenever you’re working with hot sugar.
Home canning needs proper jars, new lids, and a tested, published process. Reusing pasta sauce jars, improvising a seal, or inventing a processing time is where botulism risk lives, and botulism is odorless and tasteless. Low-acid foods, meaning most vegetables, meats, and soups, require a pressure canner. A boiling water bath cannot reach the temperature needed to make them safe, and no amount of extra time in a stockpot changes that.
Deep frying needs a thermometer too, both for the food and for your own safety, since oil that climbs too high smokes and can ignite. And never set a bowl over heat that isn’t rated for it, or seal any pressure cooker with a worn or missing gasket.
Here’s the honest drawer inventory, fifteen tools and what stands in:
- Double boiler: heatproof metal or tempered glass bowl over a saucepan, water not touching the bowl.
- Stand mixer: balloon whisk and wooden spoon, plus stretch-and-folds for bread dough.
- Hand mixer: same, except for hot meringues.
- Food processor: chef’s knife, box grater, blender, or a jar and fork, depending on the job.
- Rolling pin: chilled wine bottle or straight-sided jar.
- Pastry blender: two butter knives, fingertips, or frozen butter on a box grater.
- Sifter: fine-mesh strainer, or a hard 30-second whisk for aeration only.
- Kitchen scale: spoon-and-level measuring cups.
- Springform pan: round cake pan with a parchment sling.
- Cooling rack: a sheet pan tipped on a folded towel, or the grate from a gas burner.
- Funnel: parchment or a plastic bag with a corner snipped off.
- Pastry bag: zip-top bag with one corner cut.
- Mortar and pestle: a heavy skillet bottom or a jar over a cutting board.
- Splatter screen: a large fine-mesh strainer laid over the pan.
- Nonslip cutting board: a damp kitchen towel underneath.
Pie weights and cheesecloth each have workarounds worth their own explanation, covered in the notes on a pie weights substitute and a cheesecloth substitute, and the broader picture of what to do when a recipe calls for something you don’t have sits in the guide to cooking substitutes.
If you only add one thing to the drawer this month, make it the instant-read thermometer, and then use it on things you already thought you’d mastered. Checking a roast chicken you’ve made fifty times tells you more about your oven than any recipe will, and once you know your oven runs hot or cold, half your improvising gets easier.
Tessa Calloway
Staff Writer
Tessa Calloway has spent twenty years cooking dinner on a weeknight clock and testing the shortcuts that survive contact with a real kitchen. She believes the best recipe is the one you can make with what's already in the house, and she has strong opinions about what actually needs to be homemade (less than you think) and what always does (dressing).