Pork’s Two Cooking Camps: One Number, One Texture Cue
How to cook pork without drying it out: 145°F for chops and tenderloin, low and slow for shoulder, and the texture cue that beats a timer every time.
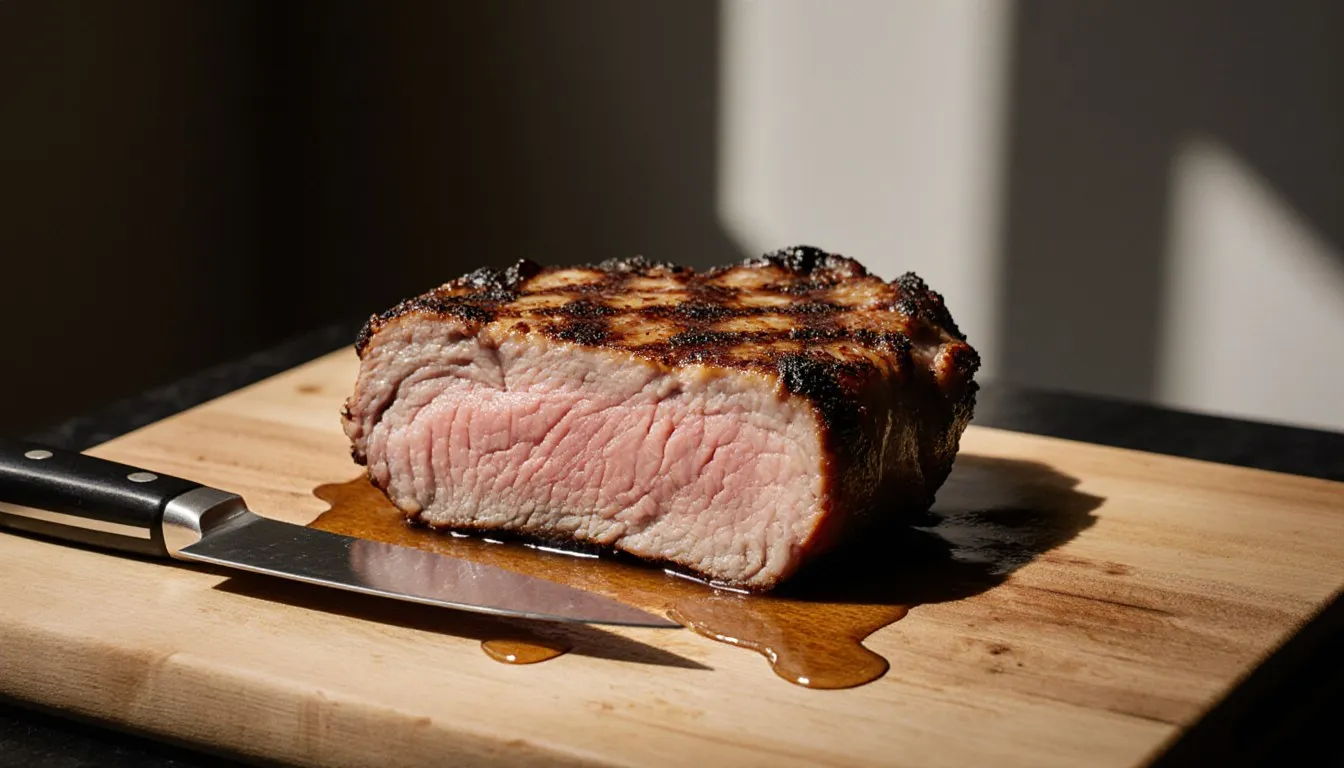
Pork is done at 145°F (63°C) with a three-minute rest, and it should still look faintly pink in the middle. That one number, applied to chops, tenderloin, and roasts from the loin, ends the gray, chalky pork most of us grew up eating. The other half of the answer is that the number only governs half of pork’s cuts. A shoulder pulled off the heat at 145°F is a tough, chewy disappointment. Shoulder comes off the heat when a fork twists free in the meat with no resistance, somewhere in the 190°F to 205°F range and hours past the point where the thermometer had anything useful to tell you.
Sort every piece of pork you buy into one of those two camps and the cooking gets easy. Below: the temperature standards, the cut-by-cut split, and the technique that goes with each side.
Why does pork have a reputation for being dry?
Because for decades, American cooks were taught to cook it to 160°F or higher, and plenty of us learned from someone who went straight past that to “no pink anywhere.” The fear behind the rule was trichinosis, a parasitic infection historically associated with undercooked pork. The precaution made sense in its era. Modern commercial pork production in the United States has made trichinosis in market hogs vanishingly rare, and the USDA lowered the safe minimum internal temperature for whole cuts of pork to 145°F back in 2011.
Fifteen years on, most home kitchens still cook by the old rule. My mother certainly did. Her pork chops came out of the pan the color of a paper bag and got covered in gravy for reasons nobody discussed out loud.
The dryness has a mechanical explanation. Muscle fibers contract and squeeze out moisture as they heat, and the effect accelerates hard past about 150°F. Modern pork is also bred leaner than the pork of the 1970s, so there’s less intramuscular fat left to disguise the loss. Cook a lean loin chop to 160°F today and you have removed both the water and the safety net.
What’s the safe internal temperature for pork?
Two numbers cover everything you’ll cook at home:
- Whole cuts of pork (chops, roasts, tenderloin, loin): 145°F (63°C), followed by a three-minute rest before carving or eating. Those three minutes are written into the standard itself, so start counting the moment the meat leaves the heat.
- Ground pork: 160°F (71°C), no rest required. Grinding distributes any surface bacteria throughout the meat, which is why it gets a higher target. Same logic as ground beef.
Precooked ham reheated at home should reach 165°F (74°C); ham that comes with cooking instructions on the package should follow the package.
Every one of those numbers is a floor, and they’re the one place in this article where I won’t offer you a range or a feel-your-way-through-it alternative. Buy an instant-read thermometer if you don’t own one. It is the cheapest upgrade to your cooking and it does more for your dinner than any pan you could buy.
What does 145°F pork look like?
Faintly rosy at the center, with juices that run clear to barely pink. If your chop is stark white throughout, it went past 145°F, guaranteed. That blush is what a properly cooked loin chop looks like at 145°F. Chicken runs on its own standard, 165°F, and the alarm most of us learned at a chicken dinner simply doesn’t carry over to pork. It takes a couple of dinners to stop flinching at it. Serve it to someone who grew up on well-done pork and be ready to say the number out loud.
Which pork cuts cook fast, and which need low and slow?
The split comes down to how hard the muscle worked on the pig. Muscles that did little work are tender and lean, with fine grain and not much connective tissue. Muscles that carried weight all day are laced with collagen, which is tough when it’s raw and gorgeous when it’s been coaxed into gelatin over several hours.
Quick-cooking, tender cuts (target 145°F, get them off the heat):
- Pork chops, bone-in or boneless, cut from the loin
- Pork tenderloin, the small, narrow muscle, usually around a pound
- Pork loin roast, the larger roast that chops are cut from
- Cutlets and thin-sliced pork, which cook in the time it takes to say so
- Pork sirloin, leaner and a little more variable, but firmly in this camp
Low-and-slow cuts (cooked well past 145°F, finished by texture):
- Pork shoulder, sold as Boston butt or picnic shoulder, the pulled-pork cut
- Spare ribs, baby back ribs, and country-style ribs
- Fresh ham, the uncured hind leg
- Pork belly
- Shanks and hocks
The two cuts people mix up most are pork tenderloin and pork loin, and the names deserve the blame. Tenderloin is a slim cylinder that roasts in well under half an hour. Pork loin is a broad roast that takes an hour or more. Buy one thinking it’s the other and your timing will be wrong by a factor of three. Check the weight on the label: a pound or so means tenderloin, three to five pounds means loin.
How do you cook a pork chop or tenderloin without drying it out?
Sear hard, finish gently, pull early, rest. That sequence works on the stove, in the oven, or across both, and it’s the whole technique.
Start by getting the meat dry. Pat both sides with a paper towel, then salt it and let it sit while the pan heats. Wet meat steams instead of browning, and browning is where most of pork’s flavor comes from.
Get a heavy skillet properly hot over medium-high, add a thin film of oil, and lay the chop down away from you. Leave it alone. Two to three minutes on the first side for a chop around an inch thick, until the crust releases from the pan on its own. If it sticks, it isn’t ready to turn. Flip, add a knob of butter and a smashed garlic clove if you’re feeling it, and tilt the pan to spoon the foaming butter over the top.
Start checking the temperature at the four-minute mark on the second side. Pull the chop around 140°F and let carryover finish the job, because the hot exterior keeps driving heat toward the cool center after the pan is out of the picture. On a thick chop that’s easily five degrees. On a thin or boneless one it can be two degrees or less, so take the temperature again at the end of the rest and confirm it reads 145°F or higher before anyone eats. If it’s short, give it another minute in the pan and check again. Ignore carryover and you’ll overshoot every single time, which is how careful cooks who own thermometers still end up with dry pork.
Rest on a plate or board for at least three minutes, longer for a roast. Then cut.
Thick chops, an inch and a half or more, do better with a two-stage approach: sear both sides in the skillet, then move the whole pan to a 375°F oven to finish. The center comes up to temperature without the crust turning to charcoal. Tenderloin likes the same treatment, seared on all sides then roasted, start checking at about 15 minutes in the oven.
The touch cue, for when the thermometer is in the dishwasher: a properly cooked chop feels firm at the edges and gives slightly in the center when you press it, like the heel of your palm with your hand relaxed. Springy-firm all the way through means you’ve gone too far.
How do you cook pork shoulder or ribs until they’re fork-tender?
Cook them past the point where any temperature target would tell you to stop, and keep going until a fork twists in the meat without resistance. Shoulder is loaded with collagen, and collagen doesn’t soften at 145°F. It needs to sit in the 190°F to 205°F range for hours before it converts to gelatin, which is what makes pulled pork glossy and moist instead of stringy and dry.
That’s why a shoulder pulled at “done” is tough while the same shoulder held at a higher temperature for six more hours falls apart. Those extra hours are doing one job: melting collagen into gelatin. The meat cleared 145°F back in the first hour or two, and everything after that is texture work.
Three routes get you there:
- Oven roast, low: Season the shoulder generously, put it fat side up in a roasting pan, and hold it at 275°F to 300°F. Figure a long afternoon, several hours for a bone-in butt in the seven-to-nine-pound range. It’s ready when the blade bone wiggles loose and pulls out clean.
- Braise: Brown the meat first, then cook it partly submerged in liquid (stock, cider, beer, canned tomatoes) in a covered pot at around 300°F. The moisture keeps the exterior from drying out during the long haul, and you get a braising liquid worth skimming and spooning over the top.
- Slow cooker: Perfectly legitimate. Brown the shoulder in a skillet first if you have the ten minutes, because the slow cooker will never give you that crust, then go eight hours on low. No apologies needed.
Ribs work the same way on a shorter clock. A rack of baby backs wrapped in foil at 300°F is tender in a few hours; spare ribs, meatier and tougher, take longer. The classic bend test is what pitmasters have gone by for generations: lift the rack with tongs from one end, and if it bows deeply and the surface cracks, it’s done. Meat that has pulled back from the bone tips is the other tell.
Take any of this outdoors and fire management and wood choice become their own argument, one I’ve made at length over in grilling and smoking meat rather than cram it in here.
One myth worth burying: the stall. Around 150°F to 170°F, a big cut’s internal temperature will flatline for an hour or more while evaporative cooling balances the heat going in. Your oven is fine. The meat is fine. Wrapping it in foil pushes through faster, or you wait it out. Do not crank the heat.
Should you brine or marinate pork before cooking it?
Brine the lean cuts if you have the time; it’s cheap insurance on a chop that has almost no fat to hide a mistake. Cooks have long treated a saltwater soak as the way to keep lean pork from going dry, and the reasoning is sound: salt helps muscle proteins hold onto water through cooking, so a brined chop loses less moisture at the same temperature.
A basic wet brine is about a quarter cup of kosher salt per quart of cold water, stirred until it dissolves. Chops need somewhere between 30 minutes and a couple of hours. Tenderloin, an hour or two. A whole loin roast can go overnight. Brine in the fridge for all of it, in a covered container or a zip-top bag set in a bowl. Raw pork sitting in a bucket of salt water on the counter for hours is the exact situation the 40°F rule exists to prevent. Longer isn’t better past a point; oversoaked pork turns spongy and tastes like ham. Rinse, pat dry, and skip or reduce the salt in the rest of your seasoning.
Dry brining is easier and I do it more often. Salt the meat all over, put it uncovered on a rack in the fridge for a few hours or overnight, and cook it without rinsing. Same moisture insurance, better browning, and no bucket of salt water taking up a fridge shelf. Easy peasy.
A marinade reaches a few millimeters into a chop and then stops, which is why it earns its keep on the surface: the sugars and aromatics brown, and the crust tastes like something. Salt is the only part of the mixture that travels any real distance inward, and it takes hours to get there. Acidic marinades left on too long turn that surface pale and mushy, so keep those under a few hours. If you want combinations worth having on hand, I’ve put a working set of them in marinated pork chops.
Two things to skip: brining enhanced pork (labels saying “contains up to X% solution” mean it’s already brined, and doubling up makes it salty), and brining anything you plan to cook for eight hours, since shoulder makes its own moisture.
What’s the difference between cooking bone-in and boneless cuts?
Bone-in takes longer and forgives more. Both are worth understanding, because the second part is why I buy bone-in chops almost every time.
Bone slows heat transfer to the meat immediately around it, so the meat near the bone stays cooler than the rest of the cut. That means the window between “just right” and “ruined” is wider on a bone-in chop, which matters most on lean cuts where the window is measured in a couple of minutes. There’s also a rim of fat and connective tissue along the bone that bastes the meat as it renders.
The practical adjustments:
- Add time on bone-in cuts, but never estimate by minutes per pound alone. Take the temperature.
- Don’t let the thermometer probe touch bone, which reads hotter than the meat around it and will tell you the chop is done when it isn’t.
- Boneless chops and roasts cook faster and more evenly, which makes them fine for weeknights, and unforgiving if you walk away.
- Thickness beats bone as a predictor of cooking time. A thin bone-in chop cooks faster than a thick boneless one.
If you’re at the counter deciding: for pan-searing, buy chops at least an inch thick, bone-in if the price is close. Thin chops overcook before they can brown, which is the whole problem in a single piece of meat.
How do you know pork is done without cutting it open?
Take the temperature in the right spot. Slide the probe into the thickest part of the cut, angled in from the side rather than straight down on a thinner piece, and stop at the center. I learned that angle the expensive way on a bone-in loin roast for eight people: I went in from the top, grazed the bone without realizing it, read a confident 152°F, and carved into a center that was nowhere near ready while the two ends were already gray. Bone reads hot and it will lie to you cheerfully. Away from bone, away from fat pockets, away from the pan surface. On a tenderloin, go in through the end and thread the probe along the length. On a chop, come in horizontally from the edge so the tip sits in the middle of the thickness.
Take two readings in different spots on anything larger than a chop. A roast can be five degrees off from one end to the other, and the low reading is the one that decides.
The backup cues, for the stretch while you’re waiting for a thermometer to arrive:
- Feel: Press the center with a fingertip. Firm at the edges, slight give in the middle. Stiff and springy throughout means overdone.
- Juices: A rough read at best, and the USDA is blunt about why: juice color is not a reliable indicator of doneness in either direction. Properly cooked pork can run pink, and pork that is nowhere near ready can run clear. Actively red and running is worth acting on, but clear juices are not permission to serve.
- Sound and smell: The sizzle changes pitch as the surface moisture cooks off, going sharper and quieter, and browned pork smells sweet and nutty rather than raw.
- Shrinkage: A chop that has visibly curled and pulled in at the edges has gone past where you wanted it.
Cooks got by on these for centuries and they will get you close. Close, on an inch-thick chop, can mean calling it done while the center sits at 132°F, and nothing on the outside of that chop tells you which way you missed. Use them as a stopgap until the thermometer arrives, then let it do the deciding. On ground pork, sensory cues are not enough, use the thermometer and hit 160°F.
Cutting into the meat to check works too, and costs you some juice. If you’re going to do it, cut into the thickest part with the tip of a paring knife rather than slicing the whole thing open, and do it after a short rest so less runs out.
What should you serve with cooked pork?
Something with acid or sweetness on the plate, because pork has enough fat and mild savor that it flattens out without a counterweight. Applesauce earned its permanent spot next to pork chops honestly. So does a sharp mustard, quick-pickled onions, braised cabbage with vinegar, or roasted stone fruit alongside a loin.
Starch soaks up whatever the meat gives back. Mashed potatoes under a braised shoulder, cornbread with ribs, buttered egg noodles beside a chop and its pan sauce. I keep a longer run of pork side dishes sorted by cut and by occasion, for the nights when the meat is settled and the rest of the plate isn’t.
Store leftover cooked pork in the fridge for three to four days, or freeze it. Sliced chops and roast reheat badly in a microwave, they go tough, so warm them gently in a covered pan with a splash of stock until they reach 165°F (74°C) all the way through. Pulled pork is the exception: it reheats beautifully with a little of its own juice, and it makes better tacos on day two than it did on day one.
Tessa Calloway
Staff Writer
Tessa Calloway has spent twenty years cooking dinner on a weeknight clock and testing the shortcuts that survive contact with a real kitchen. She believes the best recipe is the one you can make with what's already in the house, and she has strong opinions about what actually needs to be homemade (less than you think) and what always does (dressing).