You Can Start Canning This Weekend With the Pot You Already Own
Canning and preserves for beginners, minus the gear envy: what water bath canning can safely do, the equipment that matters, and how to run one batch of jam.
You can put up your first jars this weekend with a deep stockpot, a rack that fits inside it, a jar lifter, and four pounds of strawberries. Those four things are the entire entry fee for water bath canning, the method that handles jams, jellies, pickles, and most fruit. What it will not handle is green beans, corn, plain tomatoes without help, or anything with meat in it, and that limit is the single most important thing a beginner can learn before turning on the burner. Below: what the acid line means, the gear that earns its shelf space, and how to run one batch start to finish without guessing on headspace, processing time, or the seal.
What does canning mean when you’re starting from zero?
Canning is heating food inside a sealed jar long enough to destroy the spoilage organisms that can grow in it, then letting the cooling jar pull a vacuum so nothing new gets in. Two methods do that job, and they are not interchangeable.
Water bath canning submerges filled jars in boiling water. Water boils at 212°F (100°C) at sea level and will not go higher no matter how hard you crank the flame. That temperature is enough for high-acid foods, where acidity itself blocks the organism everyone worries about.
Pressure canning traps steam to raise the temperature to roughly 240°F (116°C), which is what low-acid foods require. A pressure canner is a different appliance with a gauge and a locking lid. Your grandmother’s heavy pot with a jiggler on top is one of these; a stockpot with a lid is not.
The organism setting the rule is Clostridium botulinum. Its spores shrug off boiling water, and a sealed jar of low-acid food is exactly the oxygen-free environment where they wake up and produce toxin. Acid stops them cold. That is the entire logic of the beginner lane, and once you see it, every rule that follows stops feeling arbitrary. Start with jam, and you are working inside the safest corner of the whole craft. For the wider view of where canning sits among the other methods, how to preserve food lays out the map.
What equipment do you need for a first batch?
Less than the catalogs suggest. Here is the honest minimum:
- A pot deep enough to cover your jars by at least an inch of water, with a couple more inches of clearance so it can boil hard without slopping over. Measure your tallest jar, add three inches, and check your stockpot against that. Half-pints and pints usually fit a tall stockpot; quarts often need a real canner.
- A rack that sits on the bottom. Jars resting directly on a hot pot floor can crack, and water needs to circulate underneath them. A canning rack is cheap. A round cake cooling rack or a ring of screw bands wired together does the same job.
- A jar lifter. This one is not optional. Tongs slip, and a full pint of boiling jam landing on your foot ends the evening.
- Jars made for canning, with no chips or cracks on the rim. Not the pasta sauce jar you saved. Those glass shoulders are not built for repeat thermal stress and their lids do not seal reliably.
- New flat lids, every single time. The two-piece system is a flat lid with sealing compound around the edge plus a screw band. Bands get reused for years. Flat lids get used once.
The rest is extra. A magnetic lid wand saves you fishing lids out of hot water, and a wide funnel keeps jam off the rims, both nice, neither necessary. The plastic “bubble remover” tool is a chopstick with a ruler printed on it, and a chopstick plus an actual ruler works identically.
One warning worth heeding: if you cook on a smooth glass cooktop, check your manufacturer’s manual before setting a full water bath canner on it. Some warn against the weight and against pots wider than the element. A cast iron enameled stockpot on the biggest burner is often the better call there.
Which foods are safe to can as a beginner?
High-acid foods, meaning anything at or below pH 4.6. That number is the safety line, and it is the reason jams, jellies, pickles, chutneys, most fruits, and properly acidified tomatoes can be safely water bath canned while plain vegetables and meats cannot.
Your beginner-safe lane looks like this: berry and stone fruit jams, jellies made from juice, vinegar pickles, apple butter, peaches and pears in syrup, fruit sauces. All of them are either naturally acidic or built with enough added vinegar or lemon juice to get there.
Off the table for water bath canning, permanently: green beans, corn, carrots, potatoes, beets, plain pumpkin, mushrooms, meat, poultry, seafood, stock, and anything with pasta, rice, flour, or dairy in it. Those need a pressure canner, and no amount of extra boiling time substitutes. If soup is what you actually want in the pantry, how to can soup covers that route properly.
Two things trip up otherwise careful cooks. Tomatoes hover right around the acid line depending on variety and ripeness, so tested recipes call for added bottled lemon juice or citric acid in every jar. Bottled, not fresh, because bottled has a standardized acidity and the lemon in your fruit bowl does not. And pickling vinegar must be 5% acidity, which is what standard supermarket white and cider vinegar are, but homemade or specialty vinegars often are not labeled and cannot be assumed.
Follow a tested recipe from a reliable source such as the USDA Complete Guide to Home Canning, your jar manufacturer’s current guide, or a university extension service, and do not adjust the sugar down or the vinegar down. In a cake, sugar is sweetness. In a canning recipe, the acid and the ratio are part of the safety math.
How do you process a jar, step by step?
Read the recipe through first, all of it, because canning has a window where several things need to happen at once and reading mid-panic is no fun.
- Get the canner going early. Fill it, set the rack, bring it to a simmer. A big pot takes a while to reach a rolling boil, and cold water plus hot jars is a slow start.
- Prep jars and lids. Wash jars in hot soapy water and keep them hot until you fill them. If your recipe’s processing time is under 10 minutes, the jars themselves must be sterilized, usually by boiling them 10 minutes at sea level. At 10 minutes or more of processing, clean and hot is enough, because the process sterilizes them. Treat the flat lids the way the box says: most manufacturers now direct you to wash them and keep them clean rather than boil them.
- Fill hot jars with hot food, leaving the headspace your recipe calls for. Jams and jellies typically want 1/4 inch. Pickles and fruit in syrup typically want 1/2 inch. Headspace is the gap between the food and the jar rim, and it is measured, not eyeballed.
- Release trapped air. Slide a chopstick or a thin plastic spatula down the inside of the jar and around, which lets bubbles escape. Then re-check the headspace, because it usually drops.
- Wipe every rim with a clean damp cloth. A smear of jam under the lid is the most common reason a jar fails to seal.
- Lid and band. Center the flat lid, screw the band down to fingertip tight, meaning snug with your fingertips and no cranking. Air has to escape during processing. A band torqued down hard traps it, and the jar buckles or fails.
- Lower the jars onto the rack, upright, not touching. Add water if needed so they are covered by at least an inch. Cover the pot.
- Start the timer when the water returns to a full rolling boil, not when the jars go in. Keep it boiling the whole time. If it drops off the boil, bring it back and start the timing over.
- Adjust for altitude. Above 1,000 feet, water boils below 212°F, so tested processing times get extended. The adjustment tables live in every reliable canning guide, organized by elevation band and by whether the base time is over or under 20 minutes. Look yours up once and write it on the inside of a cupboard door. Nearly every “why did my jars go bad” story from a mountain kitchen starts with a sea-level time.
- Turn off the heat, uncover, and wait five minutes before lifting jars out. That pause lets the pressure inside settle so the contents do not siphon out. Then lift them straight up with the jar lifter and set them on a towel-lined counter, an inch apart, out of a draft.
Now walk away. Twelve to twenty-four hours, undisturbed. Do not press the lids, do not tilt them to admire the color, and do not retighten a band that feels loose. The seal is forming in there while the jar cools and the vacuum draws down.
How do you know the seal worked?
After the jars are fully cool, take the screw band off completely and press the center of the flat lid with a fingertip. If it is firm and does not move, you have a seal. If it flexes or pops down and springs back, you do not. Nothing else counts as a seal test.
You will probably hear a metallic ping during the first hour of cooling, which is satisfying and also not proof. Some jars seal silently. Some ping and later fail. Press the lid.
Two more checks worth doing: lift the cooled jar by the edges of the lid alone, gently, over the counter, and see if it holds. And look at the lid in profile. A sealed lid is slightly concave, curved down in the middle. A flat or domed lid means no vacuum.
A jar that did not seal is not a disaster. You have two choices. Refrigerate it and treat it as you would an already-opened jar, which is the option I take about nine times in ten because unsealed jam gets eaten fast around here. Or, within 24 hours, empty it, check the rim for a chip, refill a clean hot jar with a brand new flat lid, and process the full time again. Reprocessed jam gets a little darker and a little stiffer. It is fine.
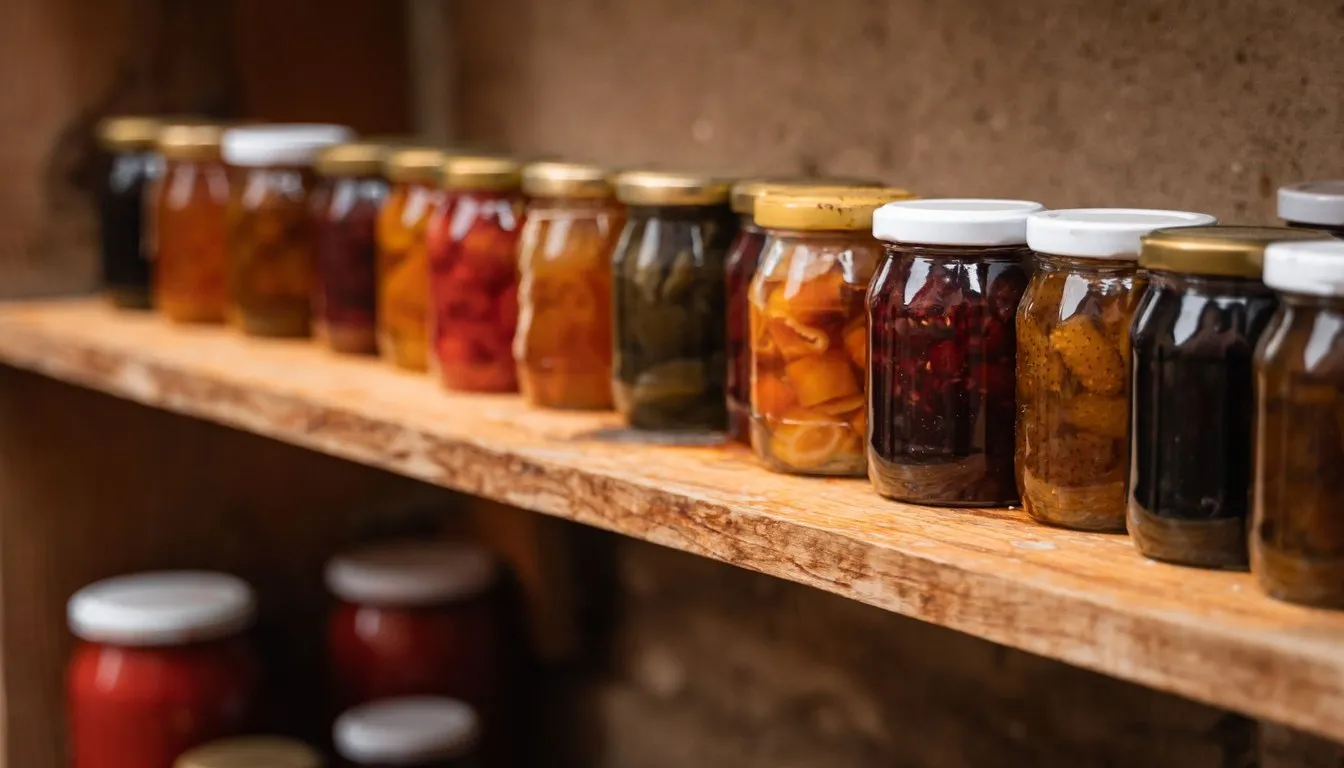
Store sealed jars with the bands off, in a cool dark cupboard. Leaving bands on is the habit that hides trouble: a jar that quietly loses its seal will look sealed as long as a band is holding the lid in place. Label with contents and date. Quality is best inside the first year, though a properly sealed jar stays safe beyond that. On the broader storage picture, how long does food last gets into it.
If a jar’s lid is bulging, if liquid spurts when you open it, if there is mold, or if it smells wrong: throw it out without tasting it. Not a taste to check. Dispose of it where children and animals cannot reach it.
Jam, jelly, preserves, or conserve: what’s the difference?
Texture and what part of the fruit stays in the jar. The distinction matters for your first project because some of these are far more forgiving than others.
- Jam: crushed or chopped fruit cooked with sugar until thickened. Fruit pulp stays in. Most forgiving of a beginner, and where I would start.
- Jelly: strained fruit juice only, set firm and clear. Beautiful, and the fussiest, because you cannot cheat the straining and a cloudy or runny batch has nowhere to hide.
- Preserves: whole small fruits or large chunks suspended in a thick syrup. Looser than jam by design.
- Marmalade: citrus, including the peel, suspended in a soft jelly. Bitter edge is the point.
- Conserve: two or more fruits cooked together, usually with nuts and often dried fruit. Cheeseboard territory.
- Butter: fruit puréed and cooked down long and slow with little or no added pectin. Apple butter is the classic.
Strawberry or blueberry jam is the first batch I recommend to everyone. Short cook, short processing time, and the failure mode is runny jam rather than an unsafe jar. Runny jam is called ice cream sauce and nobody has to know.
What trips up most first-time canners?
The same handful of things, and none of them are exotic.
Reusing flat lids. The sealing compound compresses once and will not actually pull down a second time. It fails quietly, weeks later, in a dark pantry. Bands are reusable; the flat discs are not.
Guessing at headspace. Too little and food pushes up under the lid and blocks the seal. Too much and there is more air than the process can drive out. Use the number in the recipe and measure it.
Cranking the bands tight. Fingertip tight, every time.
Cutting the acid or the sugar. Halving the vinegar in a pickle recipe or reducing the sugar in a jam changes the chemistry that keeps the jar safe and set. If you want less sugar, use a recipe written and tested for low-sugar pectin rather than editing a standard one.
Skipping the rim wipe. Ten seconds with a damp cloth prevents the most common seal failure there is.
Rushing the cooling. Moving jars to a cold counter, sticking them in front of a fan, or poking the lids at the two-hour mark all interfere with a seal that is still forming. A watched pot never boils and a watched jar never seals, as the saying goes, and the second half of that is truer than the first.
Old methods from old books. Sealing jars with paraffin wax, turning filled jars upside down to “seal” them, oven canning, dishwasher canning, and open kettle canning all appear in inherited recipe cards and none of them are considered safe now. If a technique skips the boiling water bath entirely, skip the technique.
Do you need a pressure canner next?
Only if you want to put up low-acid food, and that is a genuine fork in the road rather than a natural progression. Plenty of people can jam and pickles happily for years and never own one.
You need one the moment you want green beans, corn, carrots, plain tomatoes without added acid, stock, chili, or anything with meat on your shelf. There is no water bath workaround for those, no extra hour of boiling that substitutes, and the failure mode is botulism rather than mushy beans. It is the reason the two appliances exist at all.
If you go that direction, buy a canner built for canning rather than a stovetop pressure cooker, and check whether yours has a dial gauge or a weighted gauge. Dial gauges drift and should be tested for accuracy on a schedule; many county extension offices will test one for you. Electric multicookers with a “canning” button are not a substitute unless that specific model has been tested and approved for it, and most have not been.
Freezing covers a lot of the same ground with none of the equipment, incidentally. Green beans and corn freeze beautifully, and how to freeze food is the shorter road to a stocked kitchen if pressure canning feels like more than you want to take on this year.
Whichever way you go, run your first water bath batch small. Four half-pints of strawberry jam on a Saturday morning teaches you the rhythm of the thing, the fingertip-tight feel, the wait, the press test, in about ninety minutes. Once that sequence is automatic, try a batch of quick vinegar pickles next, where the acid comes from the brine instead of the fruit and you get to see the same logic working from a different direction.
Tessa Calloway
Staff Writer
Tessa Calloway has spent twenty years cooking dinner on a weeknight clock and testing the shortcuts that survive contact with a real kitchen. She believes the best recipe is the one you can make with what's already in the house, and she has strong opinions about what actually needs to be homemade (less than you think) and what always does (dressing).