How to Dry Herbs and Produce With a Rubber Band and a Low Oven
How to dry herbs and produce at home: the hang-and-bundle method, oven and dehydrator temps, the crumble test, and how to store it all so it lasts.
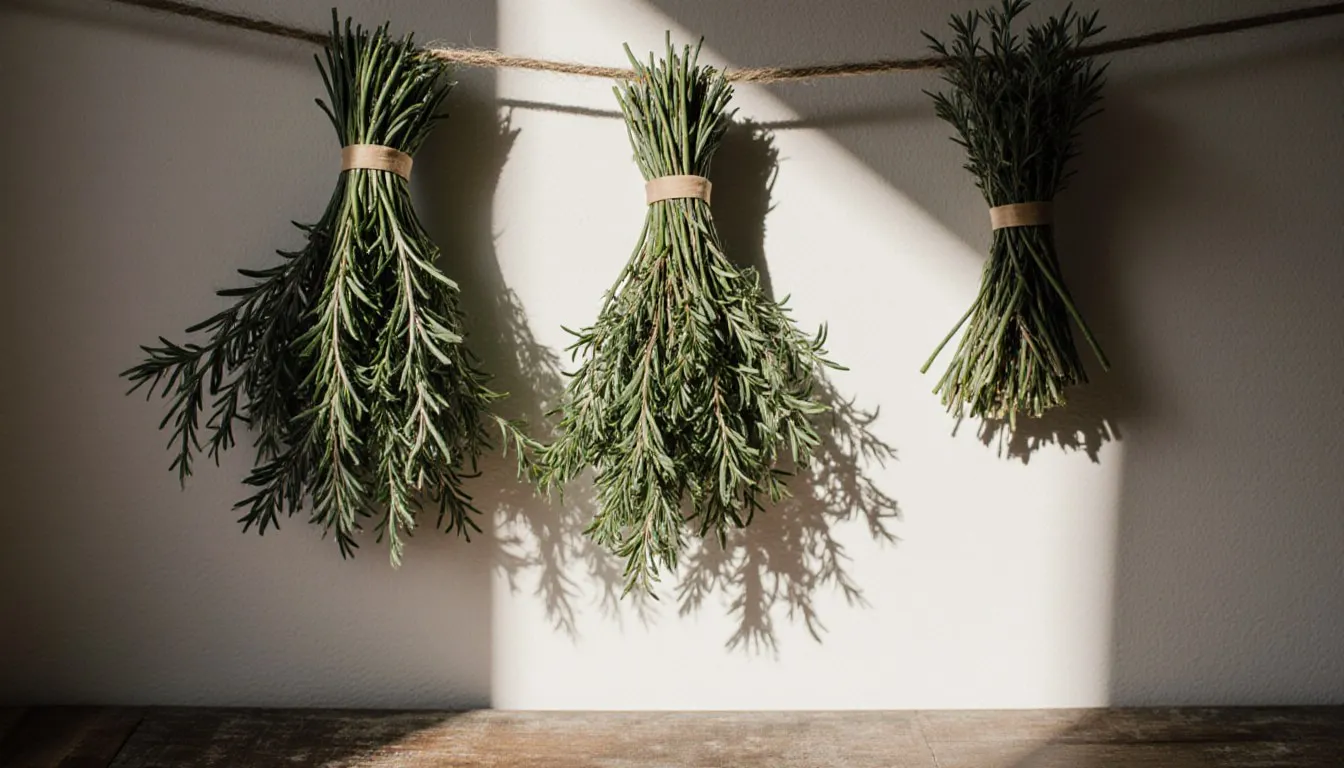
Gather the stems, wrap a rubber band around the cut ends, hang the bundle somewhere dark and breezy, and in one to two weeks you have dried herbs that will embarrass the jar in your spice drawer. That is the entire method for leafy herbs, and it costs you a rubber band. Drying fruit and vegetables is a different job: thicker flesh, far more water, and a real need for steady low heat in the 125 to 140°F (52 to 60°C) range, which means a dehydrator or an oven you have talked into running cooler than it wants to.
Below, both halves. Which method belongs to what is on your counter, the temperatures that dry instead of roast, how to tell when something is genuinely done, and the storage step most people skip right before their jar of apple slices goes fuzzy.
Why dry herbs and produce instead of freezing or canning them?
Because a jar of dried oregano sits on a shelf at room temperature for a year and takes up the space of a coffee mug. Nothing about drying requires freezer real estate, a pressure canner, a rack of lids, or a free Saturday. You dry a tray of tomatoes while you are doing other things, and what comes out weighs almost nothing and tastes more like tomato than the tomato did.
That concentration is the honest selling point. Pulling the water out pushes flavor together, which is why sun-dried tomatoes taste the way they do and why a pinch of dried thyme carries further than a sprig of fresh. Some things gain from it.
Some things absolutely do not. Freezing wins for anything you want to eat in something like its original state: berries for a crumble, green beans, sauces, cooked dishes, most delicate herbs you plan to use as a garnish. Canning wins for high-acid preserves and for shelf-stable jars of things you want wet. Drying wins for herbs, for chiles and mushrooms, for fruit you want as fruit leather or snacking slices, and for anything you plan to rehydrate into a soup later. If you are still weighing which method suits your haul, how to preserve food puts freezing, canning, drying and curing side by side.
One more thing in drying’s favor: no equipment failure ruins a year of it. A power outage does not spoil a shelf of dried herbs the way it can spoil a full freezer.
What’s the easiest way to air-dry herbs at home?
Bundle and hang. Gardeners have long sworn by cutting stems in the morning, once the dew has burned off but before the day’s heat gets into the leaves, and taking them before the plant flowers, on the reasoning that a plant putting its energy into blooming has less of it left in the leaves.
Rinse only if the herbs need it, then dry them thoroughly, and I mean thoroughly. Roll them in a towel, spin them in a salad spinner, leave them on a rack for an hour. Water clinging to leaves is the single most common reason a bundle molds instead of drying.
Then:
- Strip the leaves off the bottom inch or two of each stem so the tie has something clean to grip.
- Make the bundles small, four to six stems. A fat bunch traps damp air in the middle and rots from the inside while the outside looks perfect.
- Secure with a rubber band rather than string. Stems shrink as they dry, and a rubber band keeps tightening while twine goes slack and drops your herbs on the floor.
- Hang upside down somewhere dark, dry, and moving: a pantry, a closet with the door cracked, a corner of the kitchen away from the stove. Direct sun bleaches the color and cooks off the aromatic oils you went to all this trouble to keep.
The paper bag trick is worth doing. Punch a dozen holes in a lunch sack, slip it over the bundle, and tie it at the neck around the stems. The bag blocks light, keeps dust off, and catches every leaf and seed that drops as things shrink. If you are drying dill or coriander for the seed, the bag is doing most of the work for you.
Give it one to two weeks, longer in a damp house. Woody herbs handle this beautifully: thyme, oregano, rosemary, sage, marjoram, savory. Tender, high-moisture herbs are where hanging gets risky, and basil is the worst offender. If your kitchen is humid, do not hang basil and hope. Use heat.
How do you dry herbs in the oven or a dehydrator?
Low and slow, and lower than you think. Herbs dry at 95 to 115°F (35 to 46°C), and in a humid climate you can push to about 125°F (52°C). That is the whole range. Above it, the oils that make an herb worth drying start volatilizing away, and you end up with green dust that smells like hot paper.
A dehydrator makes this simple. Set it to its herb range, strip leaves off the stems (or leave small sprigs whole), spread them in one layer without overlapping, and start checking at one hour. Most leafy herbs are done somewhere between one and four hours. A dehydrator sounds fancy-schmancy until you have used one for a single tomato season, and then it earns its shelf.
An oven takes more coaxing, because most home ovens will not go below about 170°F (77°C), which is roasting temperature for a basil leaf. Work around it:
- Set the oven to its lowest setting and prop the door open with a wooden spoon handle. The gap lets heat escape and moisture leave, and both matter.
- Put an oven thermometer on the rack and trust it, not the dial. Ovens lie, especially at the bottom of their range.
- Spread the leaves on a sheet pan lined with parchment, single layer, or lay a cooling rack in the pan for airflow underneath.
- Start checking at 20 minutes and every 15 after that. Oven-dried herbs go from limp to done to scorched faster than seems fair.
- If your oven has convection at low heat, use it. Moving air is the point.
Some ovens hold a warm setting near 100°F (38°C), and a gas oven’s pilot light alone will dry a tray overnight. Both are fine. The microwave also works for small amounts: leaves between two paper towels, 30 seconds at a time, checking between rounds, usually one to three minutes total. Do not walk away from it, because dry leaves scorch fast and can catch fire in a microwave left running. The microwave is the fastest way to save a handful of parsley before it turns to slime in the crisper drawer, and it will leave you with a paper towel that smells like an herb garden and a few leaves browned at the edges.
For the tender herbs specifically, mint and dill each get their own full treatment in drying mint leaves and how to dry dill weed, and cilantro is stubborn enough that how to preserve cilantro is worth a look before you commit a bunch to a rack.
How do you know herbs are fully dry?
They crumble. Take a leaf between your fingers and press: if it crushes into flakes with a faint crackle, the batch is done. If it folds, bends, or feels cool and leathery, it needs more time. Stems tell you too. A dry stem snaps clean; a stem that bends still has water in it, and water in the stems will migrate into the leaves inside a sealed jar.
Clock times are a starting point and nothing more, because humidity changes everything. The same bundle of oregano might take eight days in a dry September and three weeks in a wet one. So check by hand every couple of days instead of counting down to a date, and when a batch feels borderline, give it another two days on the hook. Nothing is lost by leaving dry herbs hanging a little longer, and a bundle jarred a day early is a bundle you end up throwing out.
Two more cues worth trusting. Color should stay green, dull and matte rather than vivid, but green. Brown or bleached means the herb sat in sun or too much heat and the flavor went with the color. And smell: crush a leaf and it should hit you immediately. A dried herb that smells like nothing at close range will do nothing in a pot of beans.
How is drying produce different from drying herbs?
An herb leaf is thin, mostly surface, and gives up its water to a passing breeze. A peach slice is thick, structured, and holds a great deal more of it. Air alone will not pull that water out fast enough to beat the mold and yeast that are already living on the fruit, which is why apple rings left on a windowsill usually ferment or grow fuzz before they ever turn crisp.
So produce needs heat, and it needs the specific band of heat that dries without cooking. Too cool and the surface stays damp long enough for spoilage to take hold. Too hot and you get case hardening, where the outside seals into a shell and traps wet flesh inside. Case-hardened fruit looks finished, feels dry to the touch, and molds in the jar two weeks later, because the water never left the middle of the slice.
Produce also takes a great deal longer. Herbs are an afternoon. Fruit and vegetables run 6 to 12 hours in a dehydrator and often longer in an oven, sometimes overnight and into the next day. Plan for a stretch where the appliance is committed, and start in the morning rather than at nine at night.
What produce dries well, and how do you prep it first?
Most things with a firm structure and real flavor. Apples, pears, figs, apricots, peaches, plums, bananas, grapes, mango, pineapple. Tomatoes, mushrooms, chiles, onions, sweet peppers, carrots, zucchini, green beans, corn, celery, and herbs’ cousins in the aromatic department like garlic and ginger. Watery, delicate things (lettuce, cucumber, watermelon, citrus segments) either turn to nothing or belong in the freezer instead.
Prep does more for the final result than the machine does.
- Cut evenly: aim for slices about a quarter-inch thick, or a hair thinner. Uneven slices means half the tray is brittle while the other half is still damp, and the damp half is the one that decides how the jar goes. A mandoline is the single best tool here.
- Dip fruit that browns: apples, pears, peaches, apricots and bananas oxidize fast. Soak the slices three to five minutes in one part lemon juice to one part cold water, or in water with ascorbic acid dissolved in it, then drain well. This is cosmetic more than anything, and it is why store-bought dried apples look the way they do.
- Blanch most vegetables: a quick steam or boiling-water blanch before drying, then a cold plunge and a thorough pat dry. Blanching stops the enzymes that keep degrading color and flavor in storage, and it shortens drying time by opening the tissue up. Mushrooms, onions, peppers and garlic are the usual exceptions; they go on the tray raw.
- Halve small things, skin-side down: cherry tomatoes, grapes, small plums. If the skin is waxy, nick it or blanch briefly so moisture has a way out.
- Leave space: one layer, no overlapping, air moving on all sides. Crowding a tray to save a batch costs you hours.
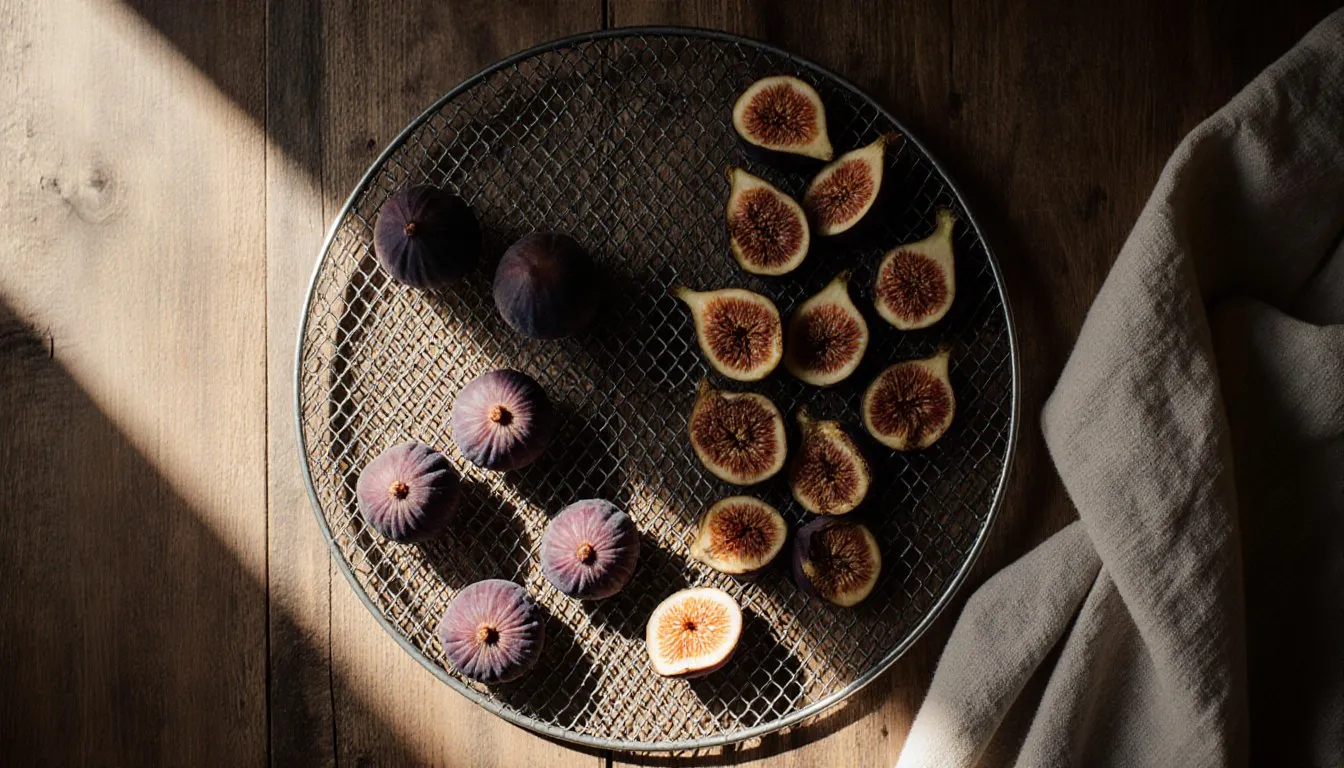
If figs or pears are your project specifically, how to dry figs and how to dry pears each go deeper on those two than a general guide can.
How do you dry fruits and vegetables safely?
Keep produce in the 125 to 140°F (52 to 60°C) range, and dry it until there are no moisture pockets left anywhere in the piece. That temperature band is the accepted standard for home drying because it is warm enough to move water out quickly and cool enough to avoid sealing the surface. Herbs are the exception that runs cooler, as above.
Rough guidance to plan around, all of it dependent on your slice thickness, your humidity, and your machine:
- Leafy herbs: 95 to 115°F (35 to 46°C), roughly 1 to 4 hours in a dehydrator, 1 to 2 weeks hanging.
- Apple and pear slices: 135 to 140°F (57 to 60°C), roughly 6 to 12 hours.
- Stone fruit halves and figs: 135 to 140°F (57 to 60°C), often 10 to 24 hours because of the density.
- Tomato halves: 135 to 140°F (57 to 60°C), 8 to 18 hours depending on how meaty the variety is.
- Blanched vegetables: 125 to 135°F (52 to 57°C), roughly 6 to 12 hours.
- Mushrooms: 125 to 135°F (52 to 57°C), roughly 4 to 8 hours.
The doneness cues matter more than any of those numbers. Fruit should be leathery and pliable with no beads of moisture when you tear a cooled piece in half and squeeze it. Vegetables go further, to brittle or crisp, because they store best bone dry. Always test a piece that has cooled to room temperature, since warm fruit feels softer and wetter than it is and will talk you into another two hours you did not need.
Underdrying is what ruins most batches. Residual moisture sealed into a jar grows mold within days, often out of sight in the pieces at the bottom, and moldy dried fruit gets thrown out, not trimmed and salvaged. If you open a jar and see fuzz, cloudiness, or any off smell, discard the batch. Do not taste it to check.
Sun drying deserves one flat warning: it needs several consecutive days above roughly 85°F (29°C) with low humidity to be safe, which rules out most of the country most of the time. A very low oven does the same job without the gamble.
How should you store dried herbs and produce so they last?
Airtight glass, cool, dark, and nowhere near the stove. Heat and light are what strip the flavor out of everything you just spent a day drying, so the cabinet above the range is the worst spot in the kitchen and the one everybody uses. Move the jars.
For herbs, store the leaves whole and crush them when you cook. Whole leaves protect their oils behind intact cell walls, and the difference between a jar of whole leaves and a jar you crumbled in August is obvious by February. Label with the herb and the date, because a hot minute in a dark cabinet turns oregano, marjoram and thyme into three identical green jars.
Dried produce gets one extra step, and this is the one people skip. Conditioning: pack the cooled pieces loosely into jars, filling them about two-thirds, and set them somewhere you will see them for 7 to 10 days. Shake each jar once a day. Any moisture still hiding in a thick piece redistributes to the drier ones instead of concentrating in one damp pocket. If you see condensation on the glass at any point, the batch is not dry enough: back onto the trays it goes. If a jar shows mold during conditioning, that batch is done, discard it.
Rough keeping windows:
- Dried herbs: about a year for good flavor, longer before they are unsafe. They fade rather than spoil. Smell test them each season and replace what smells flat.
- Dried fruit: 6 months to a year in a cool pantry, longer in the refrigerator or freezer, which is worth doing in a warm house.
- Dried vegetables: generally shorter than fruit, around 6 months at room temperature, and they hold much better cold.
Vacuum sealing or a food-safe oxygen absorber stretches all of those. For the broader picture on shelf life across your pantry, how long does food last covers the rest of it, and how to store fruits and vegetables handles the fresh stuff you did not get around to drying.
What’s the most common mistake people make drying herbs and produce?
Calling it done too early, and then sealing the jar. Almost every failure traces back to that one move. A piece of fruit that feels dry while it is still warm, a bundle of sage whose leaves crumble while the stems still bend, a tray of zucchini pulled at the eight-hour mark because eight hours felt like enough. Seal any of those and the moisture that remains has a small dark space to work in.
The close second is heat. Cranking the oven to 200°F (93°C) to finish faster gives you roasted herbs, case-hardened apples, and a house that smells better than the results taste. Herbs actually lose the most from this, since their whole value is in oils that leave at temperatures the fruit would barely notice.
Both mistakes have the same fix: cool a test piece, check it with your hands, and condition anything thick before you trust it to the shelf. Ten extra days of shaking a jar is a small price against losing a whole tray of August tomatoes in October.
Once your first batch is on the shelf, dry a tray of tomato halves specifically for winter pasta. Store them dry in a jar like everything else. When you want them, cover a handful with very hot water for 20 to 30 minutes until they turn pliable, squeeze them out, and drop them into the pan with the garlic. Keep the soaking liquid, which is tomato stock and belongs in the sauce. If you want the oil-packed version, build it the day you plan to eat it: warm the rehydrated halves in olive oil with a strip of lemon peel right in the pan. Home-packed vegetables sitting under oil are a botulism risk, so anything left over goes straight into the refrigerator and gets used within four days, or into the freezer.
Tessa Calloway
Staff Writer
Tessa Calloway has spent twenty years cooking dinner on a weeknight clock and testing the shortcuts that survive contact with a real kitchen. She believes the best recipe is the one you can make with what's already in the house, and she has strong opinions about what actually needs to be homemade (less than you think) and what always does (dressing).