Freezing Food at Home: The Habits That Keep It Worth Eating
How to freeze food so it still tastes like food: air removal, blanching, 0°F, portioning, and the labeling habit that prevents most freezer waste.
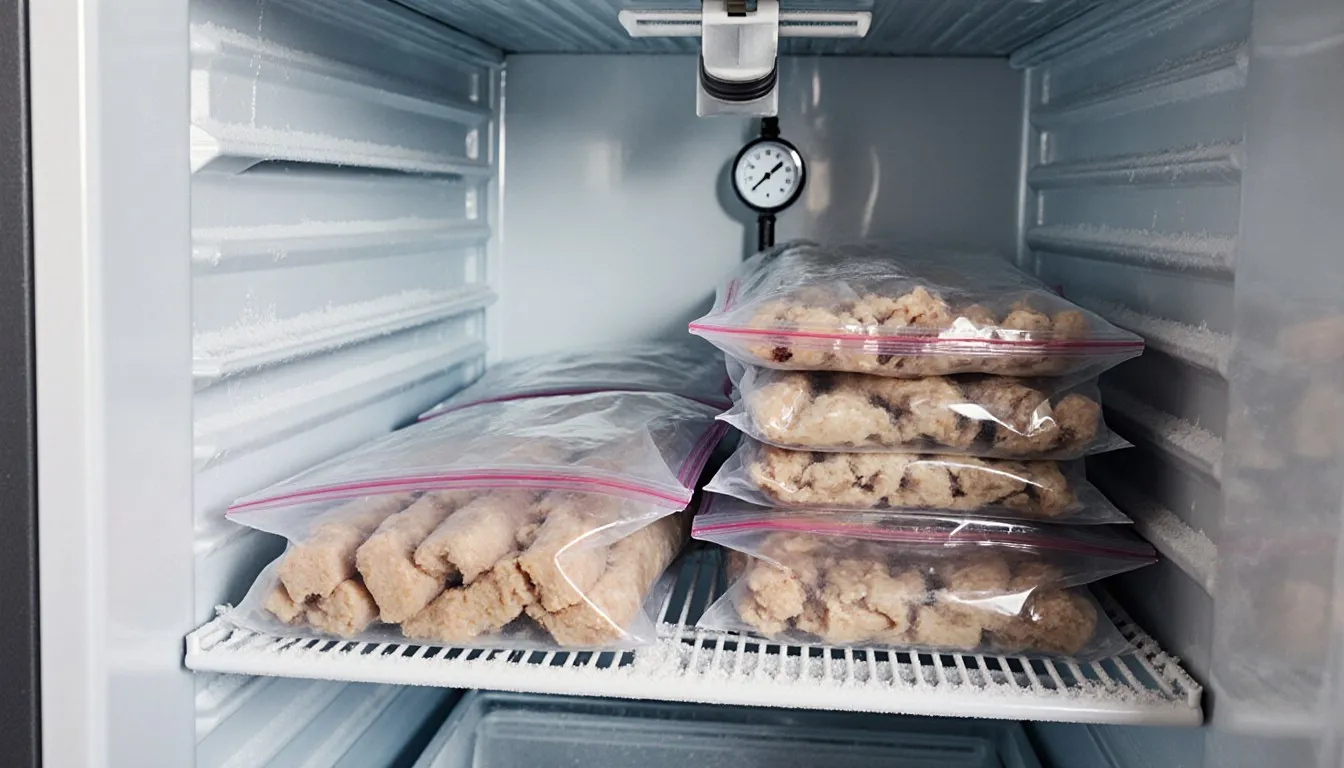
Nine times out of ten, the sad gray steak in the back of your freezer got that way because air got at it through a gap in the wrap: a loose bag corner, a torn tray film, a fold that never quite sealed. Air pulls the moisture straight out of the surface, one crystal at a time, until it dries into that pale leathery patch everyone calls freezer burn. A steak sealed tight against that air holds up for months; the same steak in a loose bag starts going gray by spring. Which means most of what determines whether your frozen food is still worth eating happens in the ninety seconds before it goes in: how you wrap it, how much air you squeeze out, whether you portioned it, whether the freezer is cold enough to freeze it fast. Get those four right and almost anything you put in there comes out the other side tasting like itself.
Get the handful of habits below down once and the rest is easy peasy.
What ruins frozen food?
Freezer burn is dehydration. Frozen water on the surface of the food turns straight to vapor and drifts off to the coldest surface it can find, usually the freezer wall or the inside of a poorly sealed bag. What it leaves behind is dried-out tissue with all its cells collapsed. That is the whitish crust on the chicken breast and the gray crystalline fuzz on the ice cream.
The food is still safe to eat. That part matters, because people throw away perfectly good meat over a patch of freezer burn. Drying out costs you flavor and texture and nothing else; the safety clock stopped the moment the food froze solid, and a leathery patch does not restart it. You can trim a burned patch off a roast and cook the rest with no trouble at all. What you cannot do is un-dry it.
The second thing that ruins frozen food is slow freezing. When food freezes gradually, water inside it has time to organize into big ice crystals, and big crystals shred cell walls. That is why a strawberry frozen slowly turns to mush on thawing while one frozen fast on a sheet pan holds some structure. Fast freeze, small crystals, less damage. This is the single reason the freezer temperature section below is not optional busywork.
Third, and quietly, oxidation. Fat goes rancid in the freezer, just slowly. That stale, crayon-ish taste on a long-frozen pork chop or an old bag of nuts is fat that has met too much oxygen. Anything high in fat, sausage, bacon, oily fish, ground beef, needs a tighter wrap and a shorter stay than lean food does.
What temperature should your freezer be?
Zero degrees Fahrenheit (-18°C) or colder. That is the standard, and it is not a suggestion or a nice-to-have. At 0°F, microbial growth stops (the microbes are not killed, they just sit dormant until thawing wakes them), which is why frozen food stays safe for as long as it stays frozen. Above that, in the range where a lot of home freezers quietly live, growth slows but does not stop, and quality falls off a cliff.
Your freezer dial reports a setting, and the compressor gets as close to that setting as a hot kitchen and a tired gasket will allow. The knob says 1 through 7 or “cold” through “coldest,” and it tells you nothing about the actual air temperature inside. Buy an appliance thermometer, the little dial or digital kind, hang it in the middle of the freezer, and check it after 24 hours. I would be lying if I said I did this before my chest freezer taught me the hard way one August.
A few things push a freezer warm without you noticing:
- A door left ajar by a bag of peas wedged in the gasket. Check the seal by closing the door on a dollar bill; if it slides out with no drag, the gasket is tired.
- Cramming in a huge batch of warm food at once. Room-temperature food raises the whole compartment’s temperature while it freezes.
- A chest or garage freezer in a hot space, working against a 95°F August afternoon.
- An over-full refrigerator freezer with no room for air to circulate around the packages.
Counterintuitively, a full freezer holds its temperature better than an empty one, because frozen mass acts like a battery of cold. If yours runs half empty, fill jugs three-quarters full of water and stack them in the gaps. They also buy you hours of safety margin in a power outage, which is worth more than the shelf space.
One habit that costs nothing: cool cooked food in the refrigerator first, then move it to the freezer. A hot pot of chili going straight into the freezer warms everything around it and freezes slowly itself, which is the worst of both.
Do you really need to blanch vegetables before freezing?
For most vegetables, yes, and skipping it is the single most common reason home-frozen vegetables taste like nothing. Raw vegetables are full of active enzymes, and those enzymes keep working at freezer temperatures. Slowly, but they work. Over a few months they dull the color, soften the texture into something limp, and give the vegetable a hay-like, faintly bitter flavor. Freezing does not stop them. Heat does.
Blanching means a short plunge in boiling water, just long enough to knock those enzymes out, followed immediately by an ice bath to stop the cooking. The vegetable comes out brighter than it went in and still squeaky when you bite it, cooked only a hair below the skin. Run it a minute long and you have dinner instead of a freezer package, so the timer earns its keep here.
The general method:
- Bring a large pot of water to a hard rolling boil, roughly a gallon per pound of vegetables. Too little water and the boil stalls when the vegetables go in.
- Set up an ice bath in the sink before you start. Not cold tap water, actual ice. This step is where people cut corners and end up with mushy beans.
- Drop the vegetables in, start timing when the water returns to a boil, and pull them at the time for that specific vegetable. It varies a lot, from about a minute for thin leaves up to several minutes for dense chunks.
- Straight into the ice bath for about as long as they boiled, until they are cold to the center.
- Drain hard and dry harder. Spread them on a clean towel and blot. Surface water becomes surface ice, and surface ice becomes a solid brick.
Times are specific to the vegetable and even the cut size, so I am not going to hand you one number and pretend it covers everything. If you are working on freezing carrots or freezing green beans, those have their own timings worth getting exactly right.
A few vegetables genuinely do not need blanching: onions, peppers, and most alliums freeze raw perfectly well, since you are almost certainly cooking them later and their texture is already going to soften. Herbs skip it too. But asparagus, broccoli, green beans, carrots, corn, peas, and greens all pay you back for the ten minutes.
What’s the best way to package food for the freezer?
The goal is simple: get the air out and keep it out. Everything below is just a different way to do that, at a different price.
Pressing the air out by hand
Free, and adequate for anything you will eat within a month or two. Fill a zip-top freezer bag (freezer bags, not sandwich bags, the plastic is thicker and less permeable to air), lay it flat on the counter, and press from the sealed end toward the opening, forcing the air out ahead of your hands. Seal the last inch as you press. Flat is the point: a flat bag freezes faster, stacks like a file folder, and thaws in a fraction of the time a lumpy one does.
The straw trick
Seal the bag almost all the way, slide a drinking straw into the last corner, suck the remaining air out, and pinch the seal closed as you pull the straw. It gets you noticeably closer to airless than hands alone. Fine for dry goods and vegetables. I would not do it with raw meat.
Water displacement
My favorite, and it costs nothing. Seal the bag except for one corner, then lower it slowly into a bowl or pot of water. The water pressure pushes the air up and out through the gap; when the water reaches the seal line, pinch it shut and lift the bag out. You get a vacuum-tight package around soups, sauces, marinated meat, anything with give to it. Keep the opening above the waterline the whole time unless you enjoy fishing a soggy label out of a pot.
Vacuum sealing
Worth the money if you buy meat in bulk, hunt or fish, put up a big garden, or regularly freeze things for longer than three or four months. A vacuum seal is the closest you will get to eliminating air, and the difference in a steak at the six-month mark is not subtle. Prices vary widely by model and the bags are an ongoing cost, so the calculation depends on how much you actually freeze. If you fill a chest freezer every fall, it pays for itself; if you freeze a couple of bags of leftover soup a month, water displacement does the same job for free.
One note on vacuum sealers and soft food: the machine will happily crush a delicate item and suck liquid into the sealing channel, which ruins the seal. Freeze soft things solid on a tray first, then seal.
Wraps, and the double-wrap rule
Freezer paper (plastic-coated on one side, coated side against the food) and heavy-duty foil both work well for solid pieces of meat. For anything staying more than a couple of months, wrap twice: a tight inner layer against the food, an outer bag or foil layer to catch what gets past the first. Plastic wrap alone is too permeable to be a long-term barrier on its own, but it makes an excellent inner layer.
Rigid containers earn their keep for liquids and anything you would rather not have shatter. Leave headspace, roughly half an inch on a pint and an inch on a quart, because water expands as it freezes and a full jar under pressure will crack. Ask me how I know.
Should you freeze in portions or big batches?
Portions. Almost always portions, and the reasons stack up fast.
A small package freezes faster, which brings us back to ice crystal size and the texture on the other end. A one-cup portion of sauce hits solid in a couple of hours; a half-gallon container takes most of a day, and the center of it sits in the slow-freeze zone the whole time. Portioning is a texture decision as much as a convenience one.
Then there is thawing. If you froze four servings of chili in one block, getting one serving out means thawing all four, and re-freezing thawed food costs you real quality every round trip. Freeze it in single or two-serving portions and you take exactly what you need.
What portioning looks like in practice:
- Ground meat: press it flat in the bag, about half an inch thick, and score it into portions with the back of a knife before it freezes. It thaws in a fraction of the time and snaps apart along the scores.
- Sauces, stock, pesto, tomato paste: freeze in muffin tins or an ice cube tray, pop the pucks out once solid, and bag them together. Now you can grab two tablespoons of paste instead of committing to the whole can.
- Berries, meatballs, dumplings, cookie dough: tray-freeze them in a single layer on a parchment-lined sheet, then bag them once hard. Loose in the bag, they pour instead of arriving as a boulder.
- Cooked grains and beans: two-cup flat packs. Straight into a pan from frozen.
The one argument for freezing something whole is when the whole thing is the meal. A casserole or a lasagna is a single unit by design, and there is no sense cutting it into squares that will never look the same again. Those have their own particulars anyway; freezing a casserole and freezing lasagna both have a few tricks worth knowing before you build them.
How long does frozen food keep?
At a steady 0°F, food stays safe indefinitely. That is the part worth internalizing, because it separates two questions people run together. Safety and quality are on completely different clocks in the freezer. A chicken breast frozen two years ago at 0°F will not make you sick. It will taste like the inside of a freezer.
So the timelines you see on charts, three months for this, a year for that, are quality windows. Every one of them is somebody’s estimate, the manufacturer’s or the food scientist’s, of the month when the eating starts sliding: flavor flattening out, texture going woolly, fat picking up that stale edge. What moves those windows in your own kitchen:
- Fat content. Lean food outlasts fatty food by a wide margin, because fat oxidizes and lean tissue mostly just dries.
- Surface area. Ground meat has enormously more exposed surface than a roast of the same weight, and it degrades faster for exactly that reason.
- Packaging. A vacuum-sealed steak and a steak in a grocery-store foam tray are not on the same timeline, not remotely.
- Temperature stability. A freezer that cycles warm every time the door opens ages food faster than a chest freezer nobody touches for a week.
- Whether it was frozen fast or slow in the first place.
If you want the specific windows by food, that is its own subject, and how long does food last lays those out properly. What you need here is the framing: the date on your label tells you how long that package has been sitting in the cold, and that number decides how you use it rather than whether you use it. Something old but well wrapped goes into a braise or a chili, where a little dulling vanishes under the seasoning. The recent, vacuum-sealed piece gets to be the steak.
What foods don’t freeze well?
Anything whose appeal depends on structure that ice will break. The pattern to learn is water content plus emulsion. High-water foods burst their own cells when the water expands into ice, and emulsified foods, the ones where fat and water are held together in a suspension, separate when that suspension freezes and cannot put itself back together on the way out.
The reliable troublemakers:
- Raw high-water produce: lettuce, cucumbers, celery, radishes, whole tomatoes, watermelon. They come out limp and weeping. Some of them are still useful frozen, just for a different job (smoothies, soup, cooked dishes), which is a different conversation than “does it freeze well.”
- Soft dairy and emulsions: sour cream, cream cheese, mayonnaise, custards, yogurt. They break into grainy curds and weeping liquid. Cream cheese in particular gets its own detailed answer, and if you have a block staring at you right now, can you freeze cream cheese covers exactly what happens and when it still works.
- Cooked potatoes in a watery dish. Potatoes in a soup or stew often go grainy and mealy after freezing, though potatoes prepared certain other ways do fine.
- Fried food with a crisp coating. The crust absorbs moisture from the food as it freezes and thaws to something you would not call crisp.
- Cream-based sauces thickened with flour or cornstarch, which tend to separate and need aggressive whisking, sometimes more than aggressive whisking can fix.
Every one of these is perfectly safe to eat after freezing. They are just sad on the plate, and sad food has a way of getting shoved to the back and thrown out in the spring cleanout anyway, so the freezer space was wasted either way. Freeze what you will be glad to find in February.
How should you thaw frozen food safely?
There are three safe methods, and the counter is not one of them. Food left on the counter to thaw sits in the danger zone, the temperature range between 40°F and 140°F, where bacteria multiply quickly, and the outside of the package reaches that range long before the middle has thawed. This is the one place where I have no flexibility to offer you.
In the refrigerator. The slowest and the best. Food stays cold the entire time and comes out with the least texture damage. Plan ahead: a pound of ground beef needs the better part of a day, a large roast or a whole bird needs a day or more per several pounds. Put it on a plate or a rimmed tray, because thawing packages leak and raw meat drip on a shelf of ready-to-eat food is how a fine dinner becomes a bad night. Food thawed this way can be refrozen without cooking first, though it will lose some quality.
In cold water. Much faster. Keep the food in a leakproof bag, submerge it in cold tap water, and change the water every thirty minutes so it does not warm up around the package. Cook it immediately once it is thawed; do not put it back in the refrigerator to sit. Never use warm or hot water, which brings the outer layer up into the danger zone while the center is still solid.
Straight into the cooking. Perfectly legitimate for a lot of things. Frozen vegetables go into the pan frozen. Frozen soup goes into a pot over low heat with a splash of water. Frozen meat can be cooked from solid, allowing roughly fifty percent more cooking time, and it still needs to reach its full safe internal temperature. A thermometer is doing more work than usual here, because a piece of meat cooked from frozen heats unevenly.
Microwave thawing works too, on the defrost setting, but it warms edges while the center is still icy, so whatever you defrost that way needs to be cooked right away rather than parked. And getting a frozen dish hot again is its own set of decisions, one pan versus oven versus microwave, so how to reheat leftovers is the better place for that.
What’s the one habit that saves the most freezer disasters?
Label everything, with contents and date, before it goes in. That is it. It is the least interesting sentence in this article and it prevents more waste than every other technique here combined.
Frozen food is anonymous. A bag of frozen tomato sauce and a bag of frozen chili look identical under an inch of frost, and neither of them looks like anything you want to eat by month four. Nobody defrosts a mystery. It gets shoved to the back, buried under the next thing, and eventually thrown out unopened.
What works, on a strip of freezer tape or straight onto the bag with a permanent marker:
- What it is, specifically. “Chicken” is not enough. “Chicken thighs, boneless, 6” tells you whether it fits tonight’s plan.
- The date it went in, not a use-by date. You want to know its age, and you can decide about quality yourself.
- The quantity or portion count, so you know what you are pulling without weighing it.
- Anything you would forget by February. “Already blanched.” “Salted.” “Needs 20 min more.”
Then rotate. First in, first out, the same principle a restaurant walk-in runs on: new packages go to the back or the bottom, and you pull from the front. When you put a new bag in, take thirty seconds to move the older ones forward. Without that, the freezer becomes a geological record, with the good stuff you want on top and a stratum of forgotten 2023 pork underneath.
Once a month, or whenever you can be bothered, look at what is in there and pick one thing to eat this week. A freezer only saves you money if the food comes back out. The rest of preserving your harvest and your leftovers, the canning, the drying, the cold storage, works on the same logic, and how to preserve food ties those threads together if you are building the whole system rather than just the freezer piece of it.
One last thing worth doing before the fall stock-up: run the freezer down as low as you can and wipe it out. An empty, dry, cold freezer with an accurate thermometer hanging in the middle of it is a much better place to put a season’s worth of food than whatever is currently in there.
Tessa Calloway
Staff Writer
Tessa Calloway has spent twenty years cooking dinner on a weeknight clock and testing the shortcuts that survive contact with a real kitchen. She believes the best recipe is the one you can make with what's already in the house, and she has strong opinions about what actually needs to be homemade (less than you think) and what always does (dressing).