Chocolate Has Moods: The Home Cook’s Guide to Melting, Tempering and Storing It
Working with chocolate goes wrong in about five predictable places. Here’s how to melt it smooth, when tempering matters, and how to rescue a seized batch.
Chocolate seizes because a drop of water got in, and once it does, no amount of stirring will bring it back to smooth. It is the failure cooks run into more than any other in home chocolate work, and the fix is a spoonful of warm liquid stirred in, which feels wrong until you understand what happened in the bowl. Everything else worth knowing about working with chocolate fits into about five moments: how you melt it, whether you need to temper it, what kind you bought, how you rescue it when it breaks, and where you keep it so it does not go pale and streaky on you. Get those five right and you can dip, bake, and store chocolate without ever opening a pastry textbook.
Why did your melted chocolate suddenly turn into a grainy clump?
Water got in. A wet spatula, steam creeping up the side of the bowl, a splash from the pan underneath, one damp fingerprint on the inside of a measuring cup. Melted chocolate is cocoa solids and sugar suspended in cocoa butter, which is fat, and fat and water do not want to be together. When a small amount of water hits that mixture, the dry particles grab it and clump together into a paste, and the whole silky pool turns to something like wet sand in about three seconds.
The maddening part is the scale. It takes very little water to do this, a few drops in a cup of chocolate, which is why the rule in every professional kitchen is that nothing damp goes near the bowl. Your bowl gets dried, your spatula gets dried, and the flavoring extract you were planning to stir in gets thought about hard before it goes anywhere near the chocolate.
Which brings up the thing that confuses people: ganache is chocolate plus a great deal of cream, and ganache does not seize. That is because a lot of liquid gives the sugar and cocoa solids enough to dissolve into properly, so instead of a few clumped particles you get a smooth emulsion. The danger zone is the middle ground, roughly a few drops up to a spoonful in a cup of chocolate, which is exactly where a stray splash off a wet spatula lands you.
Two other things will thicken melted chocolate and get blamed on water when they were not water at all. One is heat: chocolate scorched past its comfort zone goes thick, dull and slightly bitter, and there is no coming back from burnt. The other is adding something cold, like refrigerated cream straight from the fridge into warm chocolate, which can shock it into a grainy mess even though the cream is not “water.” Warm your cream first. It is a five-second habit that saves a whole bowl.
What’s the best way to melt chocolate so it stays smooth?
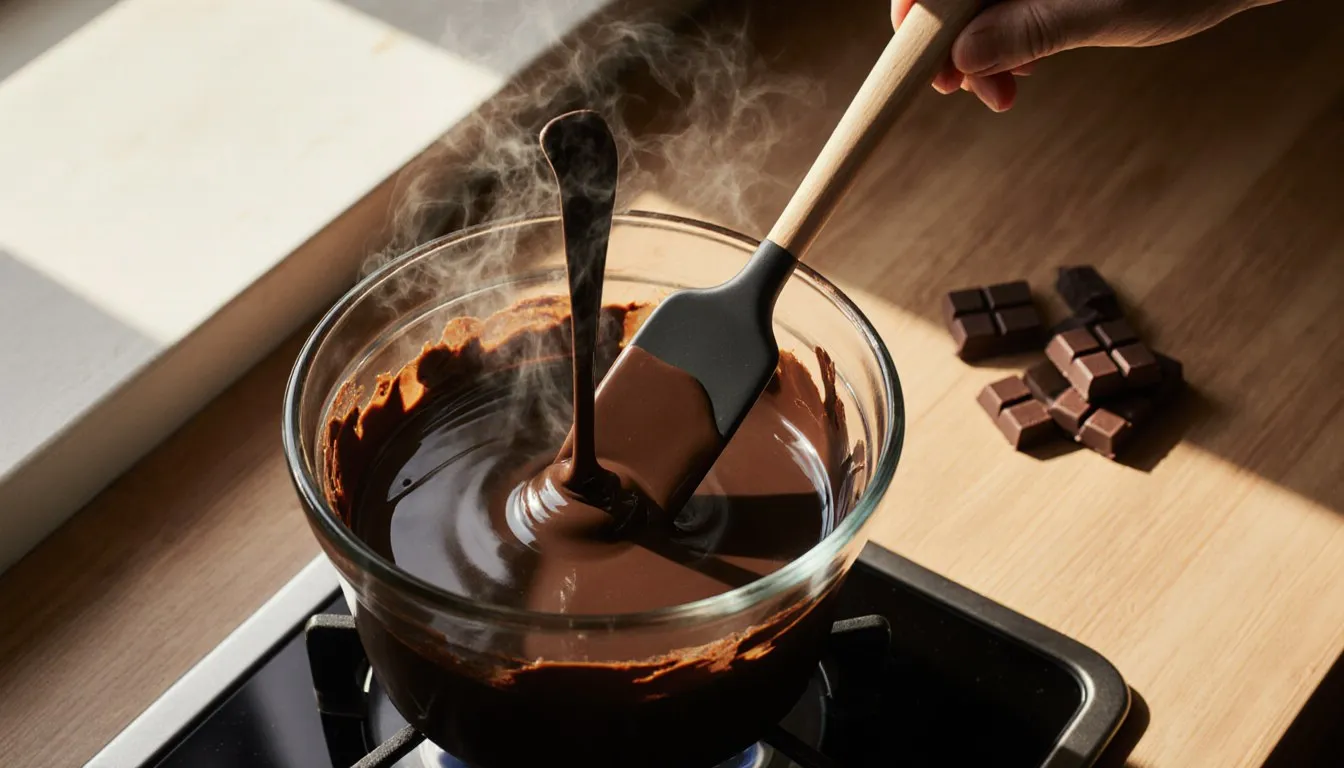
Low and slow, stirring often, and dry as a bone. That is the whole method, whichever appliance you pick. Chocolate melts at barely above body warmth, so the heat you want is the lowest setting that does anything at all. Rush it and you get a thick brown clod at the bottom of the bowl, dull and stiff, with nothing to do but start a fresh batch.
Chop your chocolate before you start, roughly the size of small pebbles. A big chunk melts from the outside in, which means the outside is overheating while the middle is still solid. Even pieces melt evenly. This is the least glamorous step and the one people skip.
The double boiler method
Set a heatproof bowl over a saucepan holding an inch or two of water, and here is the part that matters: the bowl must not touch the water, and the water should be barely simmering, not boiling. Boiling water sends up aggressive steam that finds the gap between bowl and pan, and steam is water. Put the chopped chocolate in the dry bowl, stir every thirty seconds or so with a dry silicone spatula, and pull the bowl off the heat when there are still a few small lumps left. The residual warmth finishes them off while you stir, and you get a smoother result than if you had waited for the last piece to disappear over the flame.
If your bowl fits the pan so snugly that steam has nowhere to escape, use a wider bowl. A tight seal builds pressure and pushes steam right up the sides.
The microwave method
Faster, perfectly good, and no snobbery from me about it. Chopped chocolate in a dry microwave-safe bowl, twenty to thirty seconds at a time on medium power or fifty percent, stirring thoroughly between every single burst. Not one long two-minute run. The microwave heats unevenly, so what looks like an unmelted mound is often molten underneath and the stir is what tells you the truth.
Stop while the chocolate still holds its shape but slumps when you stir it. Chocolate holds its shape long after it has melted, so trust the stir, not your eyes. Keep going until the last lumps dissolve off the heat entirely.
White chocolate and milk chocolate need more care than dark in both methods. They carry more milk solids and sugar, both of which scorch at lower temperatures, so shorten your bursts and stir more often.
Do you need to temper chocolate for a home dessert?
For most of what you make at home, no. Tempering is what gives chocolate its glossy surface, its clean snap when you break it, and its ability to sit at room temperature without turning dull and streaky. Those qualities matter enormously for something you hand to a person as a finished object, and not at all for something that is going to be baked, whipped, or melted into a mug.
Cocoa butter can set into several different crystal forms, and only one of them gives you gloss and a clean snap. Let melted chocolate firm up however it likes and you get the sloppy forms instead: soft, dull, prone to bloom, faintly grainy on the tongue. Tempering is temperature control and nothing more, melting out every crystal and then bringing the fat back down with the good ones in charge.
Skip tempering entirely for:
- Brownies, cakes, cookies, anything where chocolate is melted into a batter
- Ganache, truffle centers, chocolate sauce, hot chocolate
- Chocolate mousse and puddings
- Frostings and glazes (the sugar and fat you add change the setting behavior anyway)
- Anything that lives in the fridge and gets eaten cold within a day or two
Temper, or accept a soft dull finish, for:
- Dipped candies, truffles rolled and coated, chocolate-covered strawberries meant to be pretty
- Molded chocolates and bark that sits out on a table
- Decorations: curls, shards, piped filigree, anything you want to hold its shape in a warm room
- Anything you are giving away in a box, where the recipient sees the surface before they taste it
There is a middle path worth knowing. Untempered melted chocolate that gets refrigerated will set hard and look decent for a while, so if you are dipping pretzels for tonight’s party and keeping the tray cold until people arrive, you can honestly skip the whole business. It is when the chocolate has to survive a warm room, or a week in a tin, or a drive to somebody’s house, that untempered coating starts sweating, smudging on your fingers, and going that sad chalky gray.
If you do need to temper it, what’s the least fussy way to do it?
Use the seed method. Forget the marble slab and the palette knives, that theater exists because pastry kitchens temper five pounds at a time and need the cooling surface. At home, you borrow good crystals from chocolate that already has them.
Chop your chocolate and set aside about a third of it. Melt the other two thirds gently, using the low-and-slow method above, and bring it to roughly 115°F (46°C) for dark chocolate, a little lower for milk and white, around 110°F (43°C). That heat wipes out every existing crystal structure, good and bad, so you are starting from a blank slate.
Take it off the heat and stir in the reserved third, a handful at a time. This is the seed: it is properly tempered chocolate straight from the package, and its good crystals act as a template for the rest as the whole bowl cools. Keep stirring, keep adding, and let it come down to about 88 to 90°F (31 to 32°C) for dark chocolate, 86 to 88°F (30 to 31°C) for milk and white. If some seed refuses to melt at the end, fish it out rather than reheating.
An instant-read thermometer makes this easy peasy, and I would not try it without one the first few times. Cooks have long tested by smearing a little on the inside of the wrist or the lower lip, where tempered chocolate at working temperature reads slightly cool. What settles it is parchment: smear a little on a piece and leave it somewhere cool but not in the fridge. Properly tempered chocolate sets firm within about five minutes, looks glossy, and snaps cleanly when you bend the paper. Streaky, tacky, or still soft after ten minutes means it did not take, and you can rewarm gently and seed it again.
Two things that sabotage a good temper: a hot kitchen, and time. Work somewhere cool, and keep the bowl moving, because chocolate sitting still keeps cooling and will thicken past the point of usefulness. A brief return to a warm water bath, a few seconds only, brings it back if you catch it early.
What’s the real difference between chocolate chips and a baking bar?
Chips are engineered to hold their shape in a hot oven, and that is exactly why they behave badly when you want them to flow. A chocolate chip is designed so that it comes out of a cookie still recognizably a chip, and the manufacturer achieves that with less cocoa butter and often the addition of stabilizers or emulsifiers. Less fat means less flow. Melt a bowl of chips and you get something thicker and more stubborn than melted bar chocolate, which then sets into a coating with a slightly waxy mouthfeel.
Baking bars, sometimes labeled baking chocolate or couverture, go the other direction: more cocoa butter, so they melt into something thin and fluid that coats a strawberry in a clean even layer instead of a gloppy one. That is what you want for dipping, molding, and ganache.
How this plays out in practice:
- Cookies, muffins, anything where you want distinct pieces: chips, obviously, that is their job. Chopped bar chocolate also works and gives you those puddles and shards that people go weak for, but it will not stay in neat rounds.
- Ganache and truffles: bar chocolate. Chips can make ganache that is grainy or that splits, and the low fat content throws off the ratio.
- Dipping and coating: bar chocolate every time. If chips are all you have, they will work but need thinning, and the classic fix is a small amount of neutral oil or shortening stirred in, roughly a teaspoon per cup, added a little at a time. Do not add butter, which contains water, and do not add anything watery at all.
- Melted into batter: either one. The batter has plenty of liquid and fat of its own, and nobody will ever know.
By weight, chips and chopped bar chocolate swap one for one in most recipes, so a cup of chips (about six ounces) stands in for six ounces of chopped bar in a batter. The trade-off is texture and flow, not sweetness, as long as you match the type: semisweet chips for semisweet bar.
How do you read a chocolate label to know what you’re buying?
Two things tell you almost everything: the cocoa percentage on the front, and whether cocoa butter or a vegetable oil appears in the ingredient list.
The cocoa percentage is the share of the bar that comes from the cocoa bean, meaning cocoa solids plus cocoa butter combined. A 70 percent dark bar is 70 percent bean-derived, and most of the remaining 30 percent is sugar. Higher percentage means less sweet and more assertive, and it also means more fat from cocoa butter, which affects how thickly it sets. Where it gets slippery is that percentage tells you nothing about quality. Two bars at the same percentage can taste wildly different depending on the beans and the roast. Use the number to predict sweetness and behavior, not to rank one bar above another.
Common ranges, roughly: unsweetened is essentially all cocoa with no sugar, bittersweet and semisweet overlap somewhere in the broad middle (the labels are not strictly regulated against each other, so a semisweet from one company can be sweeter or darker than a bittersweet from another), milk chocolate sits lower with added milk solids, and white chocolate has cocoa butter but no cocoa solids at all, which is why it is ivory rather than brown.
Now the ingredient list. If you see cocoa butter and no other added fat, you have real chocolate that will melt and set the way this article describes. If you see palm kernel oil, vegetable oil, or the words “chocolate flavored” or “confectionery coating,” you have compound coating, sometimes sold as candy melts or almond bark. That product melts easily, sets hard without any tempering, and is genuinely useful for a kid’s project or a big batch of dipped pretzels on a deadline. It also does not taste like chocolate, quite, and no tempering technique applies to it because there is no cocoa butter to crystallize. Neither is a moral failing, they are just different products for different afternoons.
Couverture is the last term worth knowing. It means chocolate with a high proportion of cocoa butter, made specifically to melt thin and coat evenly. It costs more, it usually comes in bars or in small discs called pistoles or callets that save you the chopping, and it is worth buying only when the coating itself is the point. For brownies, save your money.
Can you rescue chocolate that’s already seized or broken?
Sometimes, and the move is warm liquid. A few stray drops of water clumped the sugar and cocoa solids into gravel, and a full spoonful gives those particles enough liquid to dissolve into properly, which loosens the whole gritty mass back into a smooth sauce.
Work in a warm liquid a teaspoon at a time over low heat, stirring hard: boiling water, warm cream, or warm milk. It usually takes about one tablespoon of liquid per two ounces of chocolate, sometimes more, and you will see it go from gravel to paste to glossy sauce fairly suddenly. Keep the heat gentle throughout.
Here is the honest part. What you get back is not the chocolate you started with, and it will never again be usable for dipping, molding, or anything that needs to set firm and shiny. You have made chocolate sauce. That is a fine thing to have made, and it is excellent over ice cream, stirred into hot milk, drizzled on a pound cake, or folded into a batter, but it will not go back to being coating chocolate. Do not try to rescue seized chocolate for a project that needs temper. Melt a fresh bowl and use the rescued batch for something else.
Broken ganache is a different problem with a better ending. If your ganache has gone oily or split, with fat pooling on the surface, the emulsion has come apart while the chocolate itself is still fine. Whisk in a splash of warm cream or milk, a tablespoon at a time, working from the center outward, and it usually comes back together. An immersion blender fixes it faster than a whisk if you have one. If the ganache split because it got too cold, warm the bowl briefly first, then whisk.
What cannot be saved: scorched chocolate. If it smells burnt or tastes bitter and sharp, that flavor is in there permanently, and no amount of cream, sugar, or hope will pull it out. Throw it away and start over. A confident no is cheaper than a ruined dessert.
Why did your chocolate turn pale and streaky in storage, and how do you stop it?
Bloom, and it comes in two varieties. Fat bloom is cocoa butter that has migrated to the surface and recrystallized there, leaving pale gray streaks or a dusty film. It comes from temperature swings: the chocolate got warm, the fat softened and moved, then it cooled and set on the outside. Sugar bloom is sugar that dissolved in surface moisture and recrystallized as the moisture evaporated, leaving a gritty, sandy-feeling white haze. It comes from condensation, which is what happens when cold chocolate meets warm humid air.
Both are cosmetic. Bloomed chocolate is safe to eat and tastes essentially the same, it just looks like it has been through something. Fat bloom feels slick and greasy under a finger; sugar bloom feels rough and grainy. Either way, melt it and use it in a batter, a ganache, or a batch of hot chocolate, where nobody will ever see it. Bloomed chocolate is not, however, good for tempering or coating, because that crystal structure is already disrupted.
Storage habits that prevent both:
- Keep chocolate cool and dry, ideally somewhere around 60 to 68°F (15 to 20°C), in low humidity. A cupboard away from the oven and out of direct sun does the job in most kitchens.
- Wrap it airtight. Chocolate is fatty and absorbs smells with alarming enthusiasm, so a bar stored loose next to the garlic and the onions will taste like it.
- Skip the refrigerator when you can. The fridge is cold and humid, which is the exact combination that causes sugar bloom, and every trip in and out is a temperature swing.
- If your kitchen runs hot in summer and the fridge is genuinely the only cool spot, wrap the chocolate tightly in plastic, seal it in an airtight bag or container, and let it come fully to room temperature before you unwrap it. Unwrapping cold chocolate in a warm kitchen invites condensation straight onto the surface.
- Plain bars, bark, and molded chocolate with no dairy or fresh fruit in them store the same way, in that 60 to 68°F cupboard. They bloom for the same reasons the raw bar does.
- Perishable work goes in the refrigerator, cupboard rules or not. Chocolate-dipped fresh strawberries and other dipped fresh fruit are refrigerated and best eaten the day they are made. Cream and ganache based truffles are refrigerated and eaten within about a week. A chocolate shell does not preserve what is underneath it, so treat the filling as the thing that sets the rules.
Kept cool, dry, and wrapped, dark chocolate is generally reckoned to hold its flavor for a year or more. Milk and white chocolate carry milk solids, and the usual advice is to use those within about six to nine months, so buy them closer to when you plan to use them and keep them wrapped tight in the meantime.
What if a recipe calls for a type of chocolate you don’t have in the pantry?
You can almost always swap, as long as you account for two variables: sugar and fat. Every substitution below adjusts one or both, and every one changes the result at least slightly.
- Unsweetened for semisweet: for every ounce of semisweet the recipe wants, use one ounce of unsweetened chocolate plus about one tablespoon of sugar. Works well in batters where the sugar dissolves in. Not for coating.
- Semisweet for unsweetened: harder, because you have to pull sugar out of the recipe rather than add it, which throws off the structure of a bake. If you must, use a very dark bar (85 percent or higher) and reduce the recipe’s sugar slightly. Expect a sweeter, softer result.
- Bittersweet for semisweet, or the reverse: a straight one-for-one swap by weight. Bittersweet reads darker and slightly less sweet, and it carries a touch more cocoa butter, so a ganache made with it sets firmer. Where it bites you is anything delicately balanced: a white or milk chocolate mousse, a pale buttercream, or a set ganache cut to a specific firmness, where that extra fat and lost sugar change the texture you were aiming for. In a brownie or a cookie, nobody will name the difference.
- Cocoa powder for unsweetened chocolate: three tablespoons of unsweetened cocoa powder plus one tablespoon of fat (butter, oil, or shortening) replaces one ounce of unsweetened chocolate. The fat is not optional, it stands in for the cocoa butter you removed, and skipping it gives you a dry crumb. Fine in cakes and brownies; useless for anything that needs to set.
- Cocoa powder for semisweet: same three tablespoons cocoa plus one tablespoon fat, plus about one tablespoon of sugar per ounce of semisweet. The flavor comes out a little flatter and less rounded than a bar, since you are rebuilding it from parts. Same limit as above: it will never set, so keep it to batters and frostings and stay away from chips-in-cookies recipes, where you would be replacing distinct pieces with a slurry.
- Milk chocolate for dark: swap it one for one by weight, then pull about one tablespoon of sugar out of the recipe for every two ounces you swapped. Milk chocolate carries more sugar and more milk solids, so the bake comes out sweeter and softer, browns faster, and scorches at a lower temperature, so start checking the oven about five minutes early. It will not work where the chocolate has to set: a ganache made with milk chocolate stays slack unless you cut the cream by roughly a third, and it will not hold a dipped coating at all.
- White chocolate for anything else: no. It has no cocoa solids, so it contributes no chocolate flavor and behaves differently in a batter. Treat it as its own ingredient, not a stand-in.
One caution that applies across the board: natural cocoa powder and Dutch-process cocoa powder are not interchangeable when leavening is involved. Natural cocoa is acidic and reacts with baking soda; Dutch-process has been treated to reduce that acidity and generally pairs with baking powder. Swap one for the other in a cake and you can throw off the rise. In a brownie or a frosting, where leavening barely matters, use whichever you have.
If you are working through the wider run of easy dessert recipes, chocolate is the ingredient that will humble you most often and reward you fastest once you know its handful of rules. Start with one bowl of bark this week, chopped bar chocolate, seeded temper, sea salt and toasted almonds on top, and see whether the snap comes out clean. You will know within ten minutes on the counter, and if it does not, you have learned something and you still have a pan of very good chocolate to eat with a spoon.
Tessa Calloway
Staff Writer
Tessa Calloway has spent twenty years cooking dinner on a weeknight clock and testing the shortcuts that survive contact with a real kitchen. She believes the best recipe is the one you can make with what's already in the house, and she has strong opinions about what actually needs to be homemade (less than you think) and what always does (dressing).