Easy Cookie Recipes: One Bowl, No Mixer, No Chilling
The easy cookie recipes worth your weeknight: a one-bowl method, a base ratio you can riff on, and the fixes for spread-out or cakey cookies.
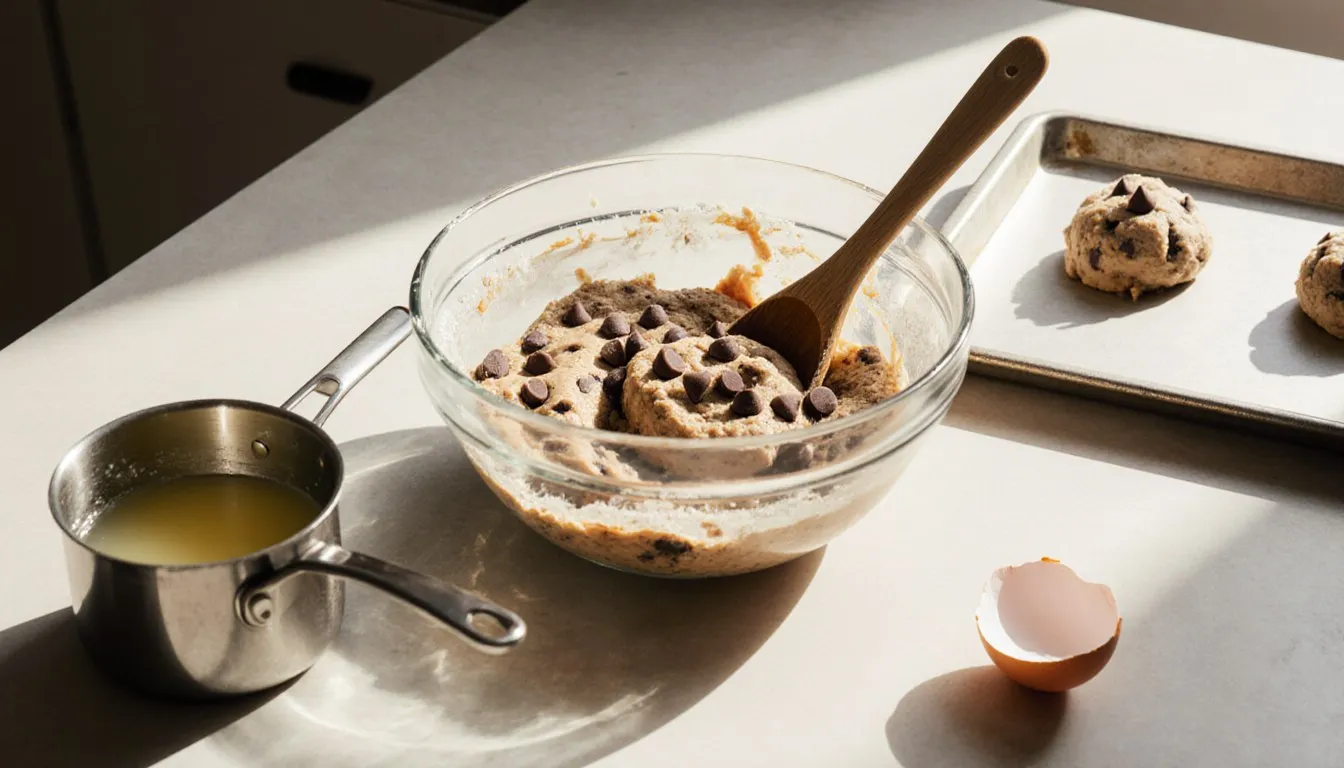
The easiest cookie recipes all share the same three things: one bowl, melted butter instead of creamed, and no chilling. That combination gets a tray of drop cookies out of the oven in about half an hour from the moment you open the flour canister, and nobody eating them will know you skipped anything. A good easy cookie comes down to a few mechanics that most recipe posts bury under four hundred words about a grandmother’s porch: how hot the butter is when the egg goes in, how many stirs the flour gets after that, and how underbaked the centers still look when you pull the tray.
So here’s the whole thing: how the one-bowl method works, when the chilling step genuinely matters (it does sometimes, and I’ll be specific), a base ratio you can bend around whatever mix-ins are in the cupboard, and the fixes for the two failures everybody hits.
What makes a cookie recipe easy?
Four tests. A recipe passes if it uses one bowl, needs no stand mixer, calls only for things a normal kitchen already stocks, and moves from bowl to oven without a rest in the fridge. Miss one and you’ve still got a fine cookie. Miss three and you’ve got a project.
One bowl matters more than it sounds like it should, because the second bowl is where the dishes multiply. You whisk your dry ingredients in it, then you have to wash it or find another one for the wet. Melted butter lets you go straight into a single big bowl and never look back.
No mixer matters because dragging out a stand mixer, fitting the paddle, and then scraping the paddle is nine minutes of setup and teardown around four minutes of stirring. A sturdy wooden spoon or a silicone spatula does everything a melted-butter dough needs, and your arm will not notice.
Pantry staples means flour, sugar, brown sugar, butter, an egg, baking soda, salt, vanilla. That’s the entire cast. Anything asking you to source cake flour or make brown butter compound is a weekend recipe wearing a weeknight costume, and there’s nothing wrong with those, they just aren’t this.
And the no-chill part is the one recipe blogs are strangely rigid about. More on that shortly, because it’s where most weeknight batches get abandoned.
The one-bowl method that works for almost any drop cookie
Order of operations is the whole trick. Do it in this sequence and you can make nearly any drop cookie in a single bowl without a mixer:
- Melt the butter. Microwave in 20-second bursts, or in a small pan over low heat. You want it liquid but not sizzling hot.
- Whisk the sugars into the warm butter. Both of them, brown and white, right into the fat. Whisk maybe thirty seconds until it looks like wet sand.
- Let it cool a minute or two, then beat in the egg and vanilla. This is the one place people get burned, literally: pour a hot butter-sugar mixture onto an egg and you get scrambled egg in your cookie dough. Touch the side of the bowl. If it’s warm and not hot, you’re fine.
- Add the flour, baking soda, and salt on top. Stir the leavening and salt into just the surface of the flour with your spoon before you start mixing everything together. Takes five seconds and it’s how you avoid a bitter soda pocket without dirtying a second bowl.
- Stir until you see maybe a few streaks of flour left. Stop there.
- Fold in your chips or nuts, which finishes the last of the mixing for you.
That last point is worth sitting on. Folding in a cup and a half of chocolate chips takes about fifteen stirs, so a dough that was already perfectly smooth when the chips went in comes out overworked by exactly that much. Stop while streaks of flour still show and let the chips do the rest.
Fewer bowls costs you nothing in quality here because a drop cookie dough isn’t a delicate emulsion. There’s nothing to break. My mother never owned a stand mixer, made cookies in one bowl her whole life, and I never once heard anyone at her table complain about the crumb structure.
Do you really need to chill the dough?
Usually not, and the internet has oversold this step badly. A standard drop cookie with melted butter, a normal flour ratio, and a room-temperature kitchen bakes beautifully straight from the bowl. Skipping the chill is the difference between cookies tonight and cookies theoretically.
Chilling does two real things. It firms the fat so the cookie holds its shape longer in the oven before it spreads, and it gives the flour time to hydrate, which deepens flavor and darkens color. Both are real gains, and you can bake a very good cookie without either one.
Chill when any of these are true:
- Your kitchen is hot. August afternoon, oven already running, butter melting on the counter. Warm dough spreads, full stop. Twenty minutes in the fridge fixes it.
- The dough is genuinely slack, as in it won’t hold a mound on the spoon and slumps flat. Something is off in the ratio or the butter was too hot. Chill it and reassess.
- You’re rolling or cutting anything. Cut-out cookies, slice-and-bake logs, anything that needs to keep an edge. Not negotiable there.
- The recipe is high-butter by design. Some brown-butter and shortbread-leaning doughs really do need it.
- You want the deep-flavor version. Long-rested dough, a full day or two in the fridge, browns more and tastes richer. Bakers have sworn by the overnight rest for years and they’re not wrong, it just isn’t a Tuesday.
For everything else, scoop and bake. If you want insurance without the wait, park the loaded baking sheet in the fridge or freezer for ten minutes while the oven finishes preheating. The dough balls chill from the outside in, which is the part that matters for spread, and you’ve spent zero extra minutes.
Melted butter vs. softened butter, and what changes
Melted butter gives you a denser, chewier, flatter cookie. Softened butter creamed with sugar gives you a lighter, taller, more cake-adjacent one. Pick on purpose and you stop being surprised by your own cookies.
Creaming whips air into solid fat, and that air is what pushes a cookie taller and finer in the oven. Melted butter carries none, so the dough goes in dense, spreads, and bakes up chewy with that slightly crackly top a lot of us are actually chasing.
What that means at the counter: melt the butter to barely liquid, never steaming, and give it two or three minutes off the heat before the egg goes anywhere near it. Butter that comes out of the microwave hot and split, with a slick of oil floating on top, bakes greasy and runs wide on the pan. Stir it back together and let it sit, easy peasy, and it goes into the dough behaving like butter again.
If you want the middle ground: use melted butter, but let it cool until it’s opaque and thickening at the edges. You get most of the chew with a little less spread. And if a recipe calls for softened butter and yours is rock hard from the fridge, cut it into small cubes and leave it on the counter for fifteen minutes. Do not microwave it into a puddle and call it softened, that’s a melted-butter cookie now, and it will behave like one.
Why did my cookies spread into one giant puddle?
Nine times out of ten it’s temperature. Warm dough, warm baking sheet, or both. The fat liquefies before the structure sets, and the cookie runs.
Run down the list in this order:
- Hot dough. Butter that went in near-boiling, or a kitchen well over normal room temperature. Fix: chill the scooped dough ten to twenty minutes.
- A reused hot pan. This is the sneaky one. You pull batch one, drop batch two onto the same sheet, and it starts melting before it ever sees the oven. Fix: use two sheets and let each cool completely, or run the hot one under cold water and dry it.
- Too little flour. Scooping the measuring cup straight into the bag compacts flour, so most people over-measure, but a gentle scooper can easily come up short. Fix: spoon flour into the cup and level it, or weigh it. If you’re consistently getting flat cookies, add two tablespoons of flour to the next batch and see.
- Dead baking soda. Soda loses power sitting open in a cupboard for a year. Fix: drop a pinch into a spoonful of vinegar. Vigorous fizz means it’s alive, a lazy bubble or two means replace it. Cheap test, cheap fix.
- Greased pans. A greased sheet gives the cookie a slick surface to slide across as it spreads. Fix: parchment paper. It grips just enough, it releases cleanly, and it’s why parchment beats greasing for almost any drop cookie. A silicone mat works too, though it runs a touch warmer on the bottom.
- Too much sugar relative to flour. Sugar liquefies in the oven. More sugar, more spread.
If a batch spreads into one continuous sheet, don’t throw it out. Let it cool completely on the pan, then cut it into squares with a sharp knife. Cookie bars are a legitimate dessert and nobody has to know it wasn’t the plan.
Why did my cookies come out cakey or tough instead of chewy?
Three levers, in order of how often they’re the culprit: too much flour, too much mixing, and the wrong sugar balance.
Too much flour is the big one, and it’s almost always a measuring problem. Dip a cup into a flour bag and pack it and you can pick up noticeably more flour than a spooned-and-leveled cup. Do that twice in a recipe calling for two and a quarter cups and you’ve quietly built a scone. A kitchen scale ends this argument permanently for about the price of a takeout dinner, and it’s the one gadget I’d tell a new baker to buy first.
Overmixing is the second. Every stir after the flour goes in develops more gluten, and gluten is what makes bread chewy in a good way and cookies tough in a bad way. This is where the melted-butter method quietly helps you, because you’re mixing by hand and you’ll stop before a mixer would.
Then sugar. Brown sugar holds moisture and stays soft, which reads as chew. White sugar dries out more in the oven and gives you crisp edges and spread. A dough that’s mostly white sugar bakes thinner and snappier; a dough that leans brown bakes softer and chewier. If your cookies are cakey and you’ve already checked the flour, swap a quarter cup of the white for brown and try again.
Two smaller levers worth knowing. An extra egg yolk (no extra white) adds fat and richness and pushes toward chewy. And baking powder instead of soda is a lift-and-rise leavening, so a recipe using powder will bake up taller and more cake-like by design. If a cookie recipe you love is cakier than you want, check whether it’s calling for powder. That’s often the answer sitting right there in the ingredient list.
Build your own easy cookie: the base ratio plus mix-ins
Once you know the skeleton, you don’t need a new recipe for every variation. The classic drop cookie sits roughly at:
- Flour: 2 to 2 1/4 cups all-purpose
- Butter: 1/2 cup (1 stick), melted
- Sugar: 1 cup total, split between brown and white to taste (3/4 brown to 1/4 white bakes chewy, reverse it for crisp)
- Egg: 1 large, plus an extra yolk if you want it richer
- Baking soda: 1/2 teaspoon
- Salt: 1/2 teaspoon, or a scant 3/4 if you’re using unsalted butter and like a salty edge
- Vanilla: 1 to 2 teaspoons
- Mix-ins: up to 1 1/2 cups total
That makes roughly two dozen cookies, give or take how generous your scoop is. Speaking of which, a spring-loaded cookie scoop is the difference between a tray that finishes evenly and a tray where the small ones burn while the big ones stay raw. A medium scoop, the kind holding about a tablespoon and a half, is the workhorse.
Now the riffing. A cup and a half of mix-ins is your budget, and you can spend it however you like:
- Chocolate chips, chunks, or a chopped-up bar (chopped bar gives you those melty pools that chips are engineered not to make)
- Toasted nuts: pecans, walnuts, almonds. Toast them first, seven or eight minutes in a dry pan until they smell nutty, and they’re a completely different ingredient
- Rolled oats, but pull 2 tablespoons of flour for every 1/2 cup of oats you add, since oats drink up liquid the same way flour does. They also bake up heartier and a little more crumbly, so keep oats under about a cup here or the dough stops holding together
- Dried fruit: cherries, cranberries, chopped apricots. Plump them in hot water for ten minutes first if they’re leathery
- Shredded coconut, toffee bits, chopped pretzels, crushed potato chips
- Warm spice: a teaspoon of cinnamon, a pinch of cardamom, a scrape of nutmeg
- Citrus zest, which does more for a plain dough than almost anything else at that price
Two rules on mix-ins. Don’t exceed the budget, because past about a cup and a half the dough can’t hold everything together and your cookies crumble on the spatula. And salty plus sweet always earns its keep, so a flaky salt sprinkle on top before baking is thirty cents of upgrade on the whole batch.
How to tell cookies are done without staring at the timer
Set edges, pale and puffy centers that still look slightly underbaked. Pull them there. That’s the whole test, and it beats any timer, because your oven’s idea of 350°F (175°C) and mine differ by more than either of us would like.
For a medium-scooped drop cookie at 350°F, start checking at 9 minutes and expect somewhere in the 9 to 12 minute range. Bigger scoops run longer, and pans on a lower rack brown on the bottom faster.
The visual cues, in order of reliability:
- The outer ring has gone from wet-looking to matte and set, and it’s just starting to take color.
- The center still looks glossy and puffed. It should look like it needs another two minutes. It doesn’t.
- Nudge the edge with a spatula. If the cookie slides as one piece instead of buckling, the structure has set.
- Smell. When the kitchen goes from smelling like sweet dough to smelling like toasted butter, you’re within a minute or two of done.
Then leave them on the hot sheet for five minutes before moving them. They keep cooking on the pan, and this carryover is doing real work: it firms up that soft center into chew instead of goo. Move them too early and they fold in half on the spatula. Every home baker learns this exact lesson at least once.
Also: rotate the pan front to back at the halfway mark. Almost no home oven heats evenly, and the back corner is always hotter than the front.
Can you freeze cookie dough to bake later?
Yes, and it’s the best thing you can do with twenty spare minutes. Scoop the whole batch into balls, freeze them on a parchment-lined sheet until solid (about an hour), then transfer to a freezer bag. Bake them straight from frozen, adding a couple of minutes to the time and checking for those same set edges.
For quality, use frozen cookie dough within about three months. Food kept at 0°F (-18°C) stays safe indefinitely, that’s the standard, but raw dough picks up freezer flavors and dries at the edges long before safety is the issue. Label the bag with the date and what’s in it, because a frozen ball of cookie dough looks exactly like every other frozen ball of cookie dough.
In the fridge, dough with raw egg in it keeps a few days, and I’d treat three to four as the outside edge. If you’re going longer than that, freeze it.
One food-safety note worth stating plainly, since it comes up every single time someone’s kid is hovering by the bowl. Raw cookie dough is not safe to eat. Both the raw egg and the raw flour carry risk: flour is a raw agricultural product and has been linked to outbreaks of illness, and it isn’t treated to kill bacteria before it’s bagged. Heat-treated flour and pasteurized egg product exist and there are dough recipes written specifically to be eaten unbaked. A regular batch of dough isn’t one of them.
If you’re doing the freezer thing regularly, keep a bag of plain base dough with no mix-ins and stir the additions into individual portions as you bake. Same afternoon of work, a different cookie every time you want one. The ratio table above is all you need to start swapping. Next batch, try trading a quarter cup of the flour for rye: it bakes toasty and faintly malty against dark chocolate, and nothing else about the method changes.
Tessa Calloway
Staff Writer
Tessa Calloway has spent twenty years cooking dinner on a weeknight clock and testing the shortcuts that survive contact with a real kitchen. She believes the best recipe is the one you can make with what's already in the house, and she has strong opinions about what actually needs to be homemade (less than you think) and what always does (dressing).